My Top Ten Landscape Photography Tips

After over fifteen years of digital landscape photography these are the practical tips that I think can help you take better landscape photography images. Everything from easy useful tricks to essential bits of kit. If you want to improve your images then read on.

Top ten landscape photography tips by Scott Tilley

Tripod Tricks

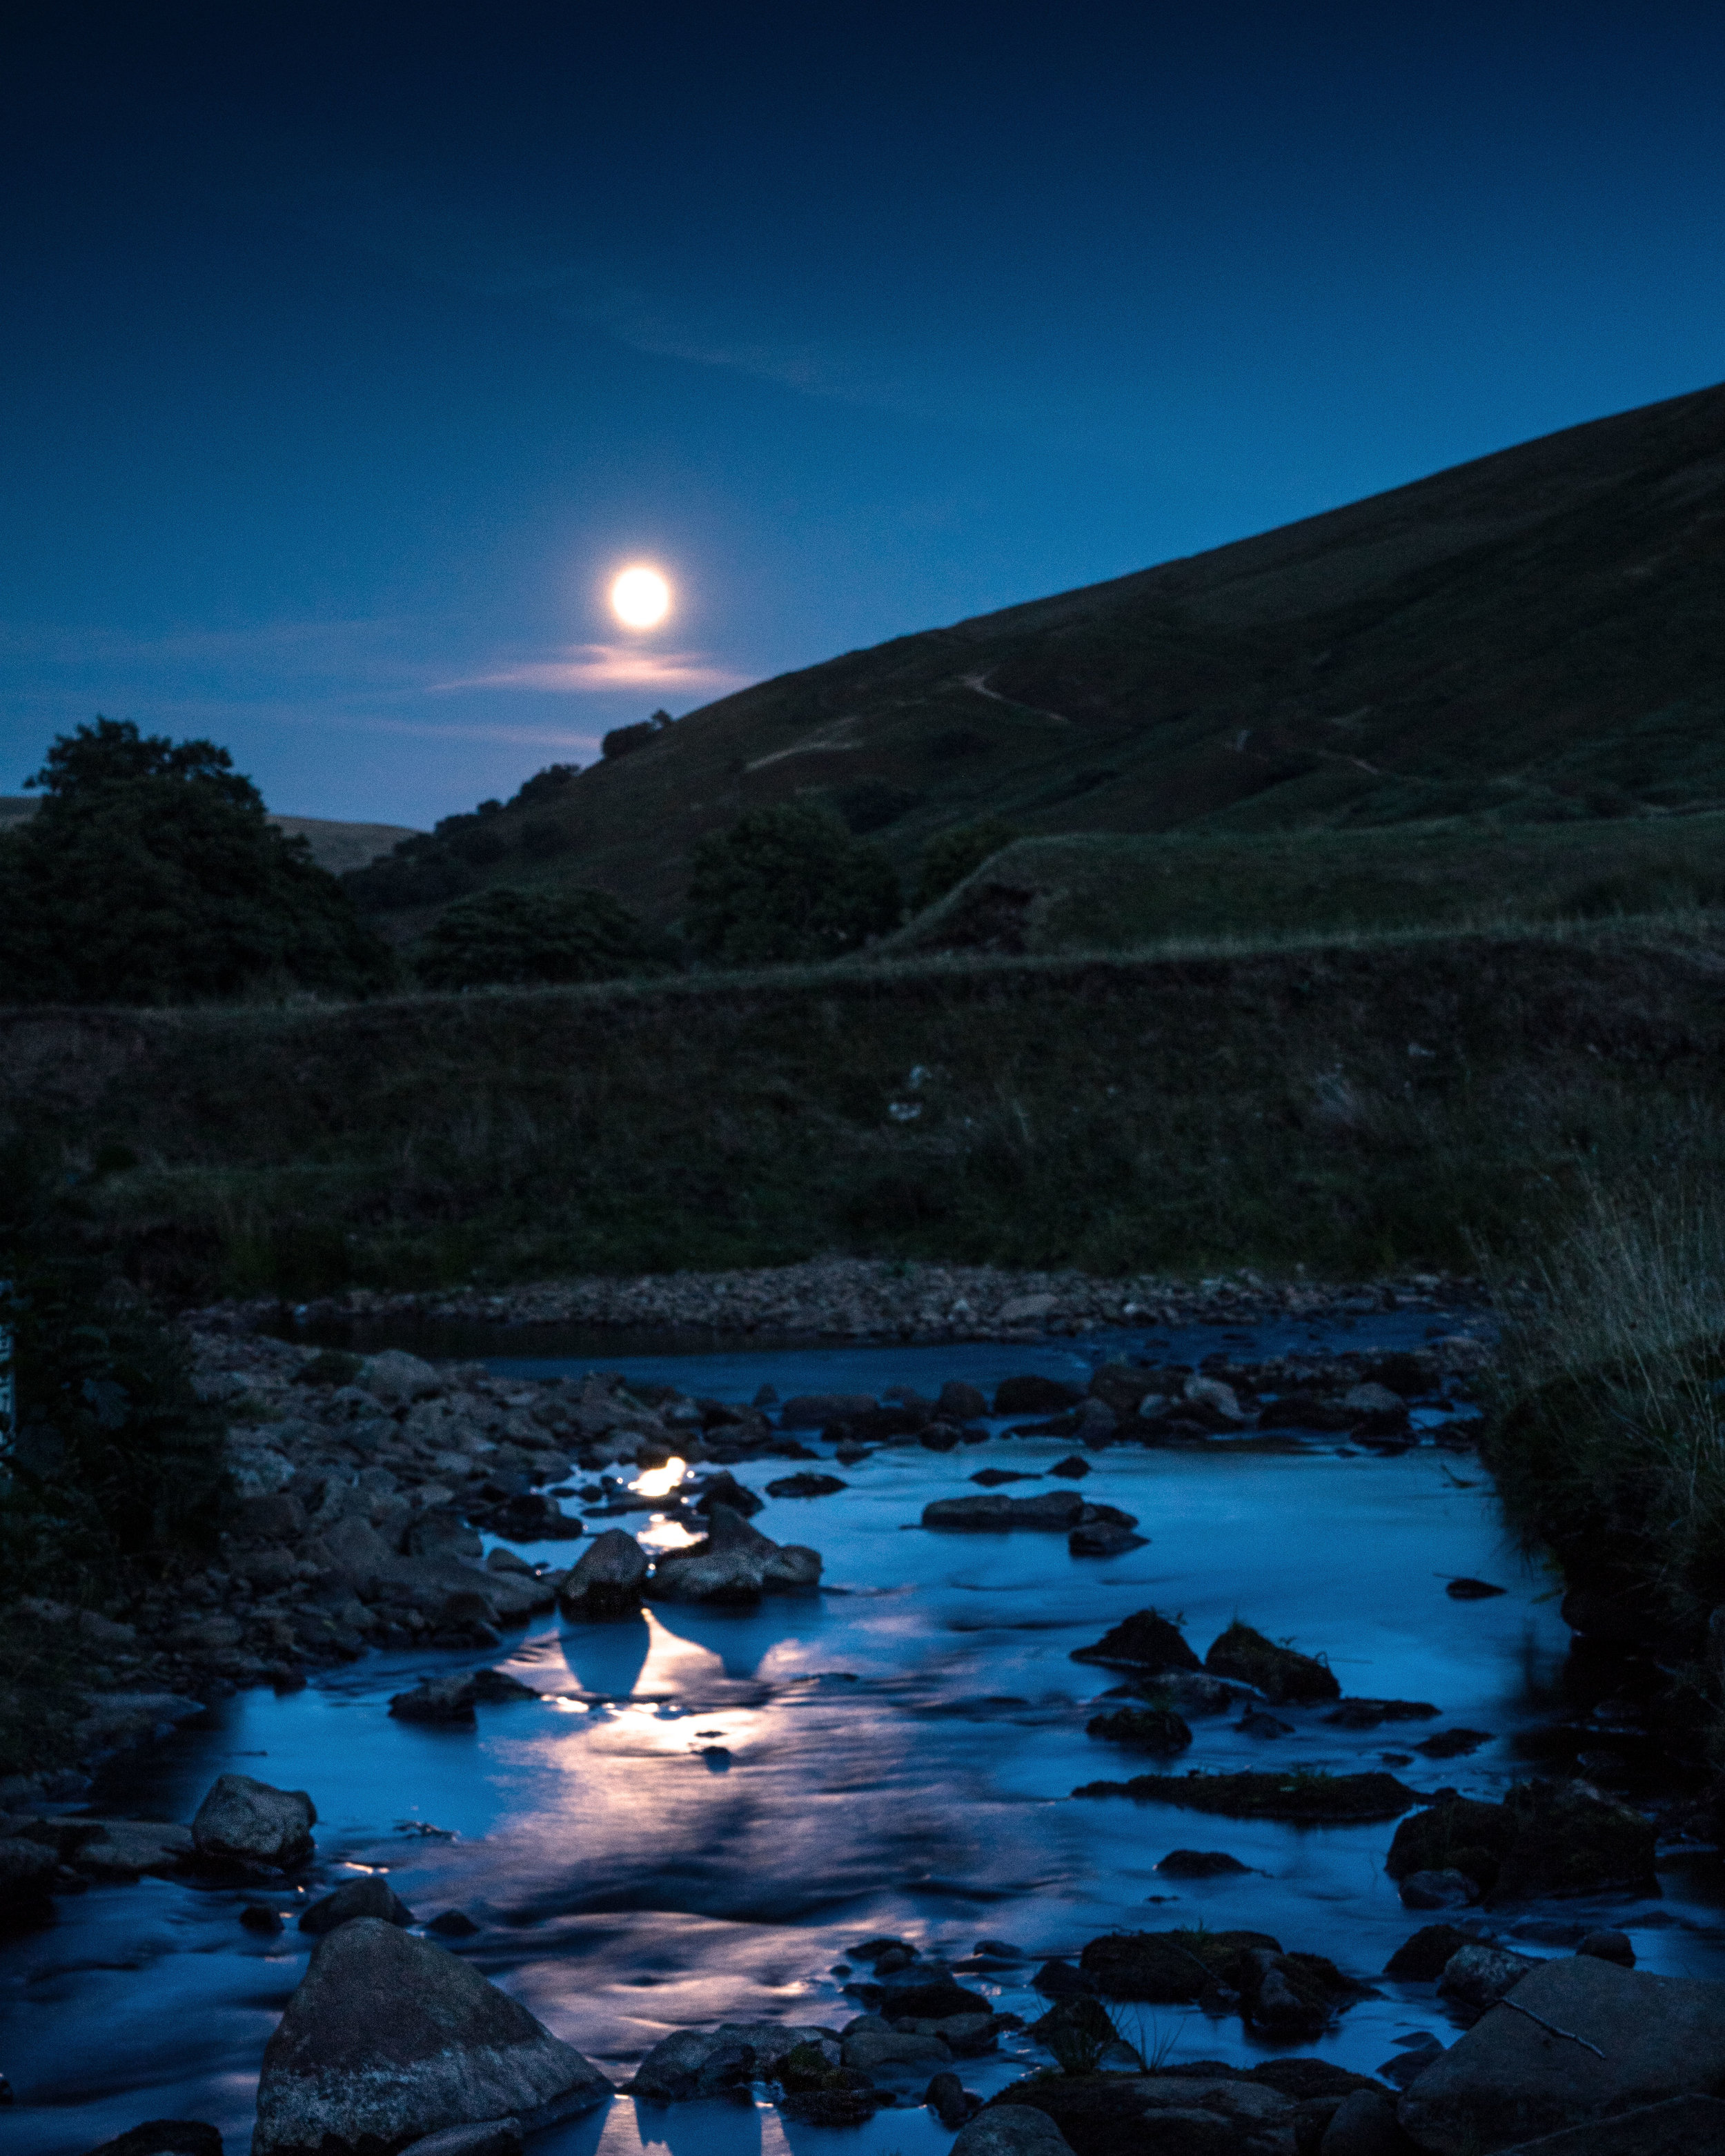
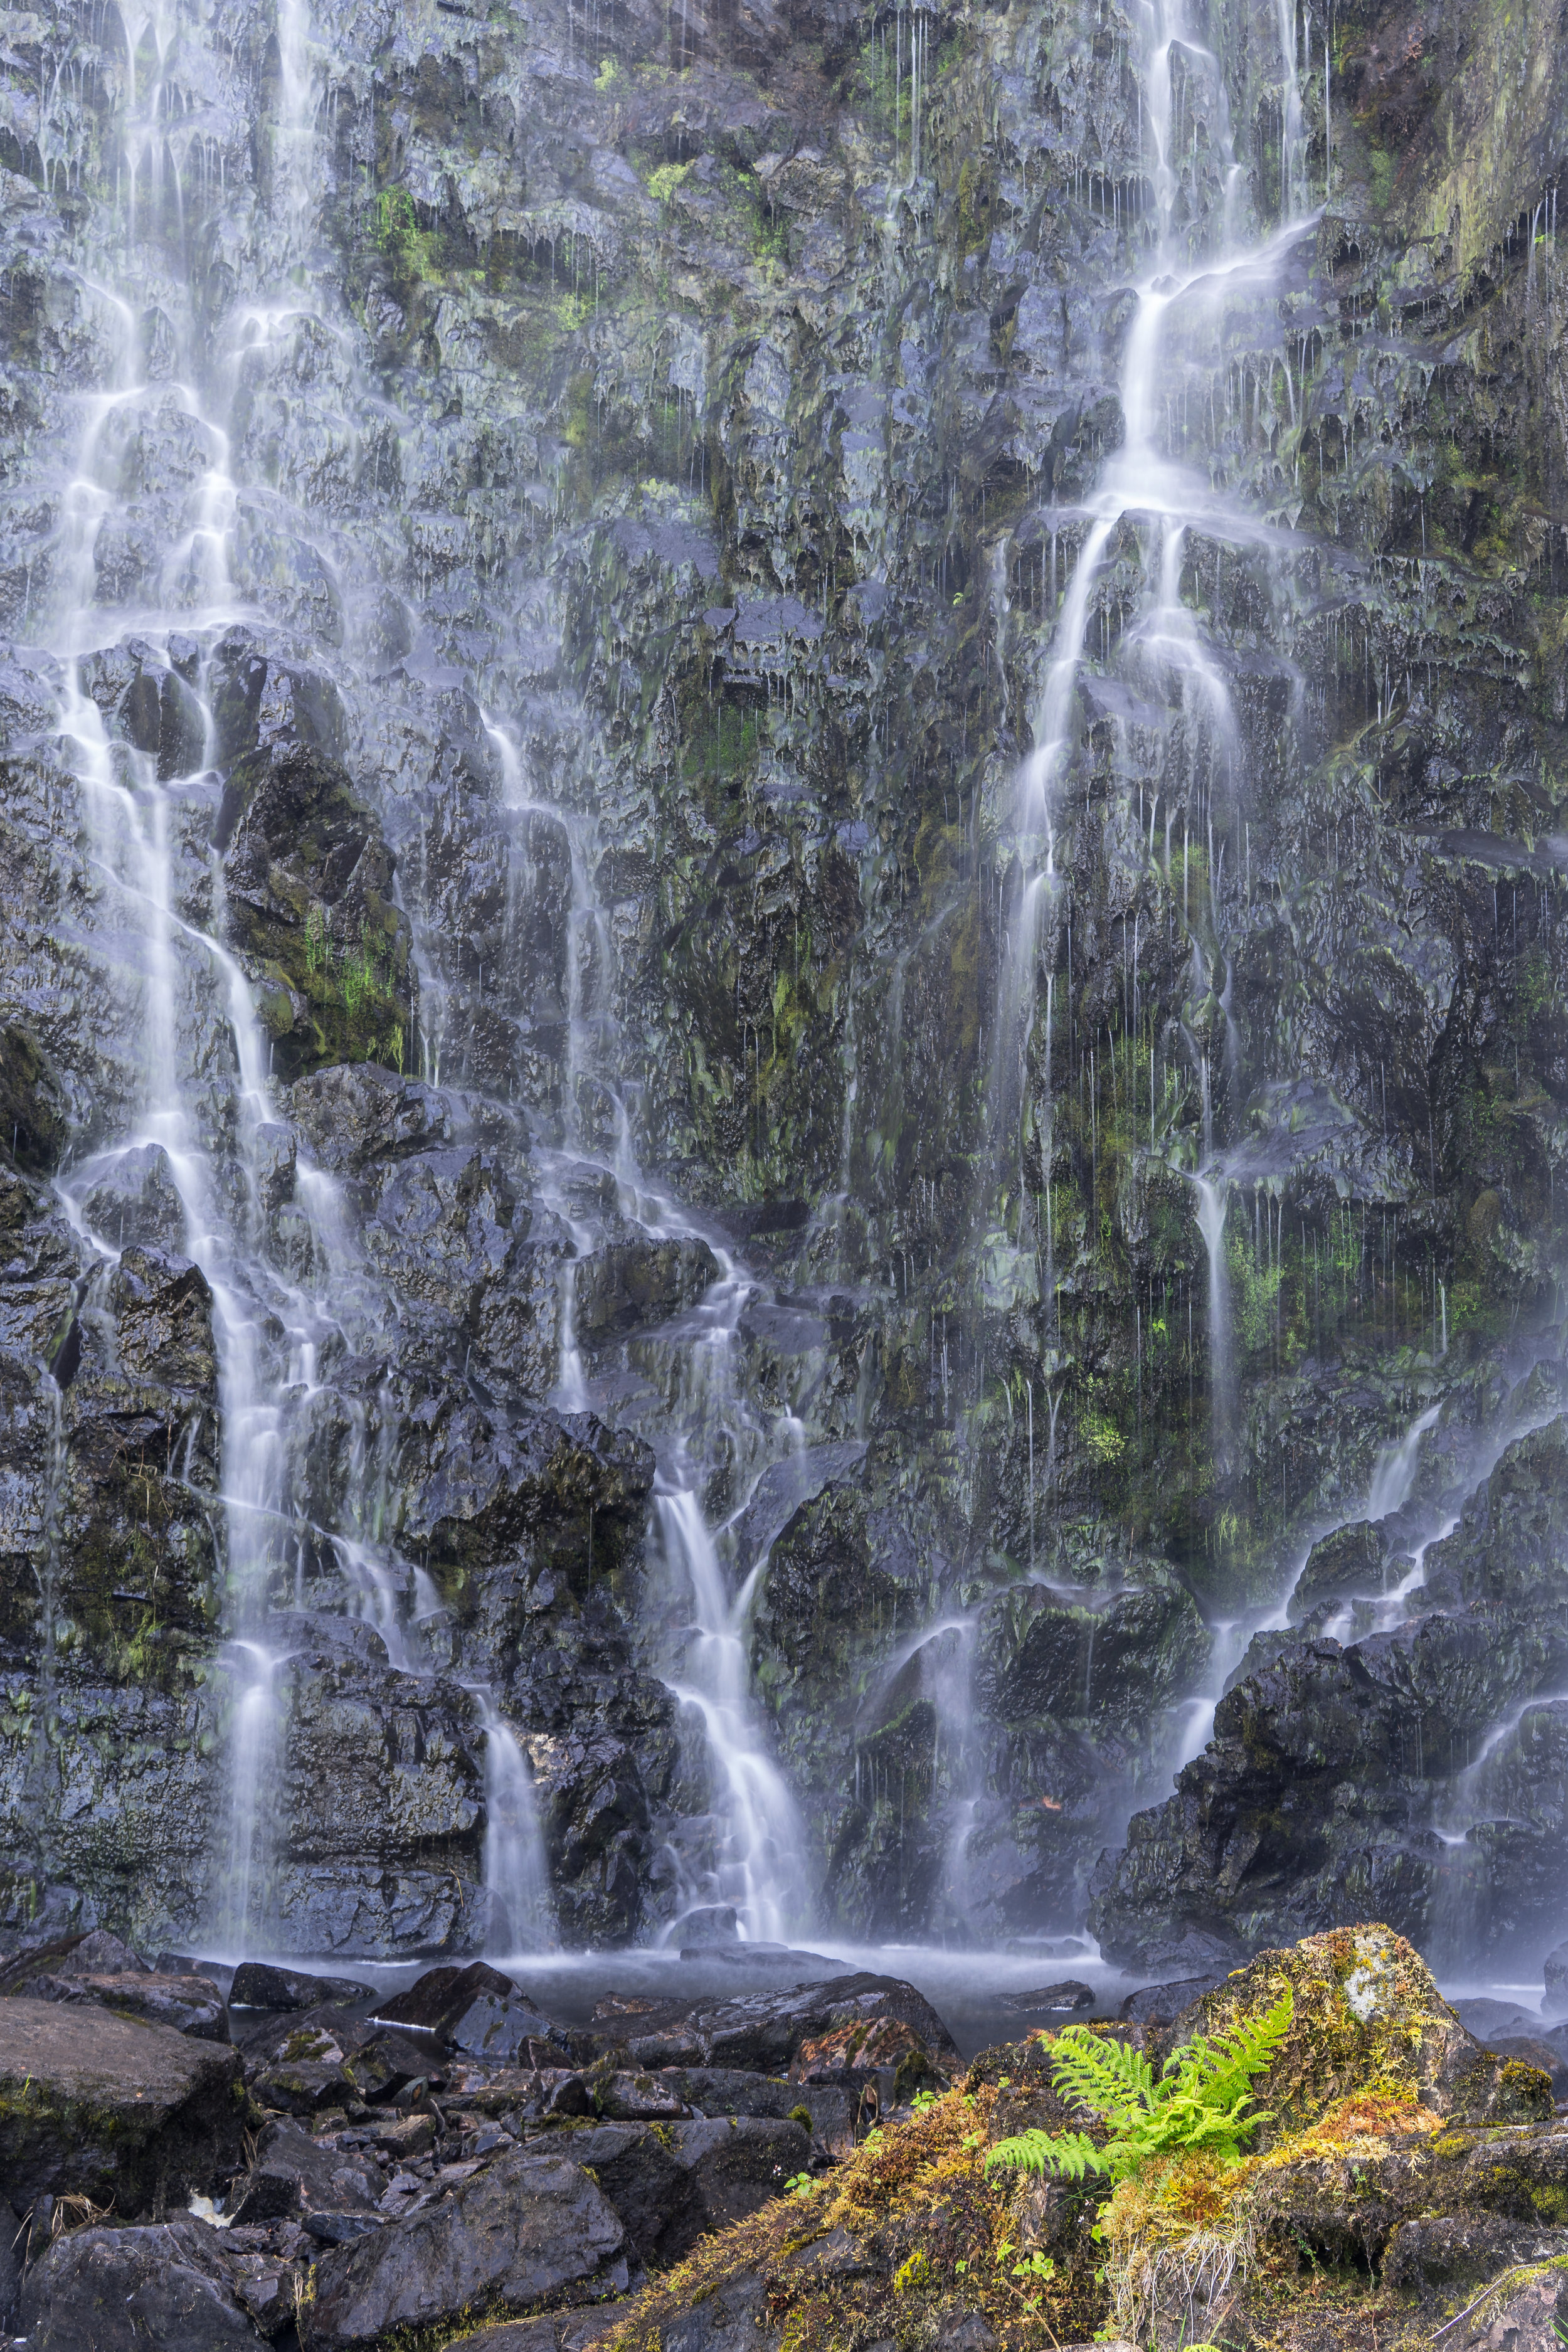
A tripod is essential if you want to capture long exposures such as here to slow down and blur the water.

Get a Tripod - I know you have probably heard this one a dozen times before. You want you shot to be sharp so using a tripod will achieve this right? So you need to go out and buy the best all singing all dancing most expensive tripod you can. Well, no not really, for me the equation is very simple. You need to buy the tripod that you are going to take out with you every time your out on a landscape shoot. This is not the same thing. I have owned tripods before that extend to enormous heights and drop incredibly low to the floor, have every conceivable feature, yet fifty percent of the time I left it at home because it was too heavy. Every photographer is different and has there own requirements of a tripod, and every tripod will have compromises. The trick is to find the one that achieves your goals most of the time and that you are happy to take out on every shoot, then you have found the perfect tripod for you.

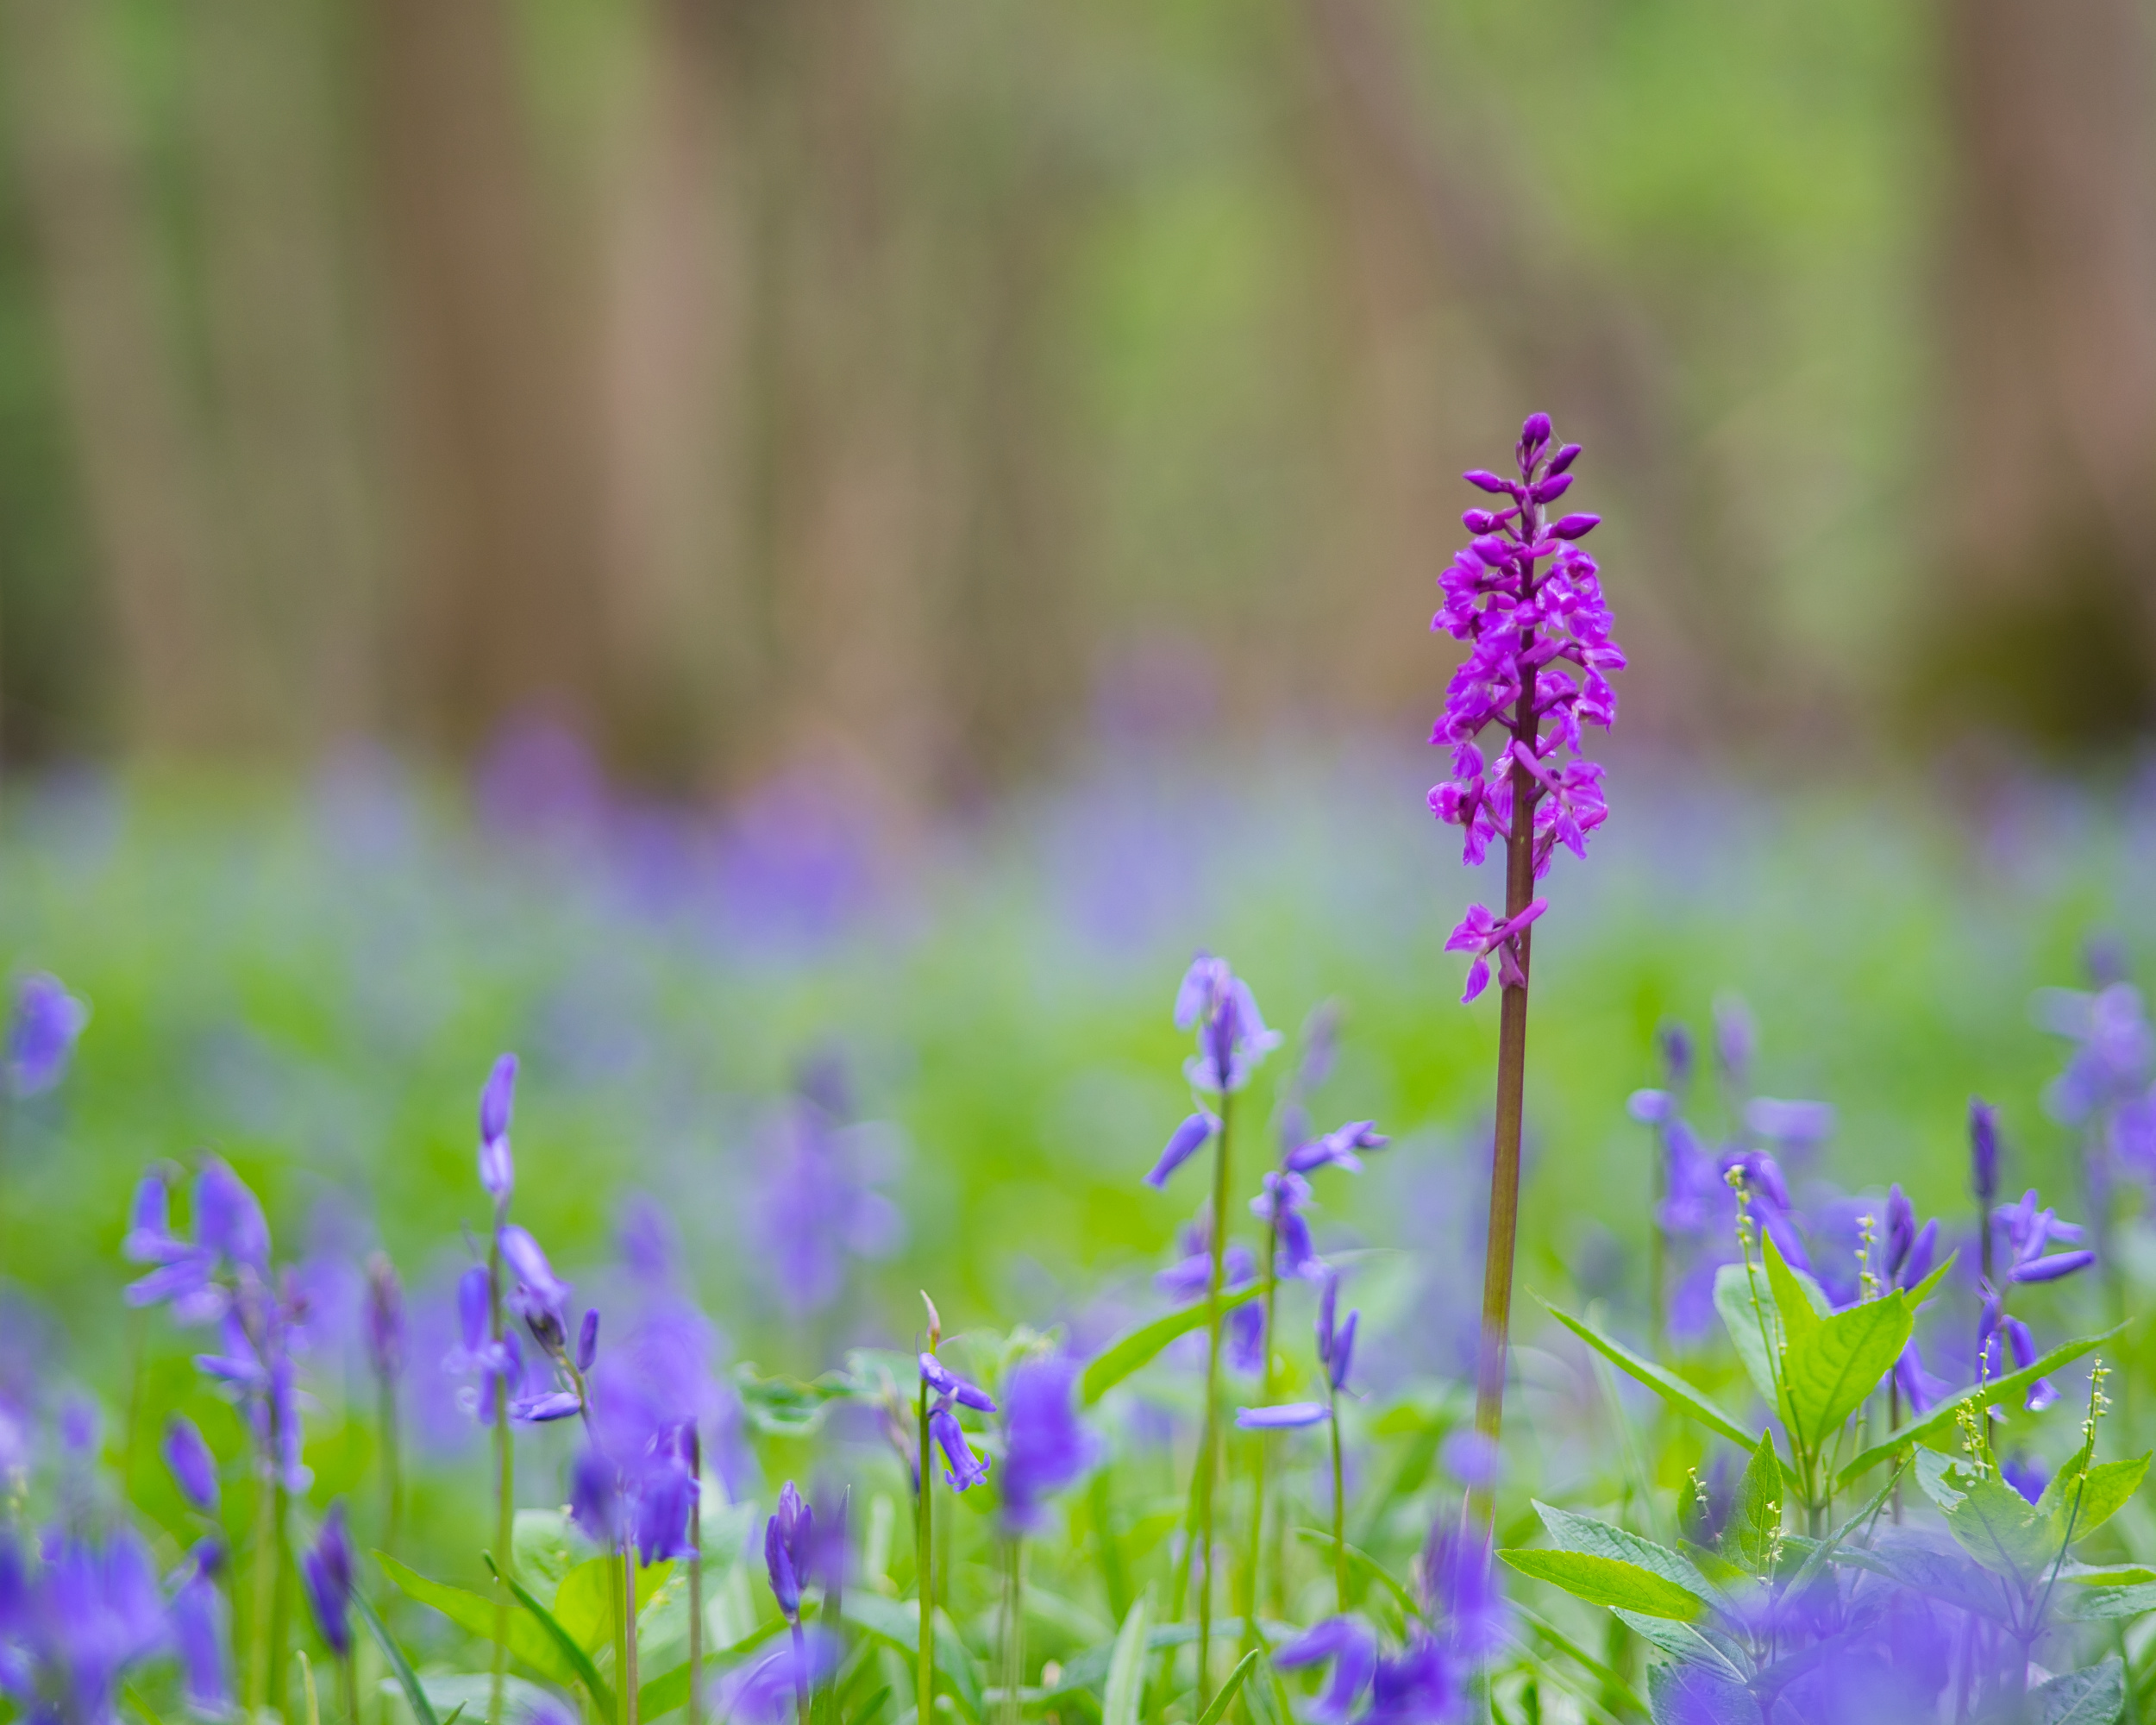
Work a Location - What I mean by this is that far too often we visit a place, take a shot and consider that location as done. A good example of this may be that you are out on a family walk in the middle of the day, you spot a nice composition, you stop and take a picture. All very nice but it could be so much more. Consider what that location might have to offer at different times of the day. What about the time of year? Will the shot look better in Autumn? Maybe it could be transformed in different weather? You see the possibilities are endless. Some photographers can find a composition and can visualise that shot taking in all the above variables. They might even write notes on the conditions they want to go back in, it could be years before everything they want lines up correctly for the shot they can see, but when it does they’ll be ready.

Get a Ground Sheet - I think over the years this has turned out to be one of my best purchases. The humble groundsheet can be used for so many things. Firstly as it says you can put it on the ground to provide a dry surface for the photographer, perhaps you going for a ground level shot. It can also be used to stick you kit on to keep that off the ground. If like me your often waiting for a shot to develop it can be used to throw over the camera and tripod as you wait for that rain to subside.. In a dire situation you can also use it to make a basic shelter to wait out the weather or await rescue. So, I am never without a groundsheet and use it most days even if it generally just provides a dry seat to sit and eat lunch!

Top ten landscape photography tips by scott tilley

Wild CAmp

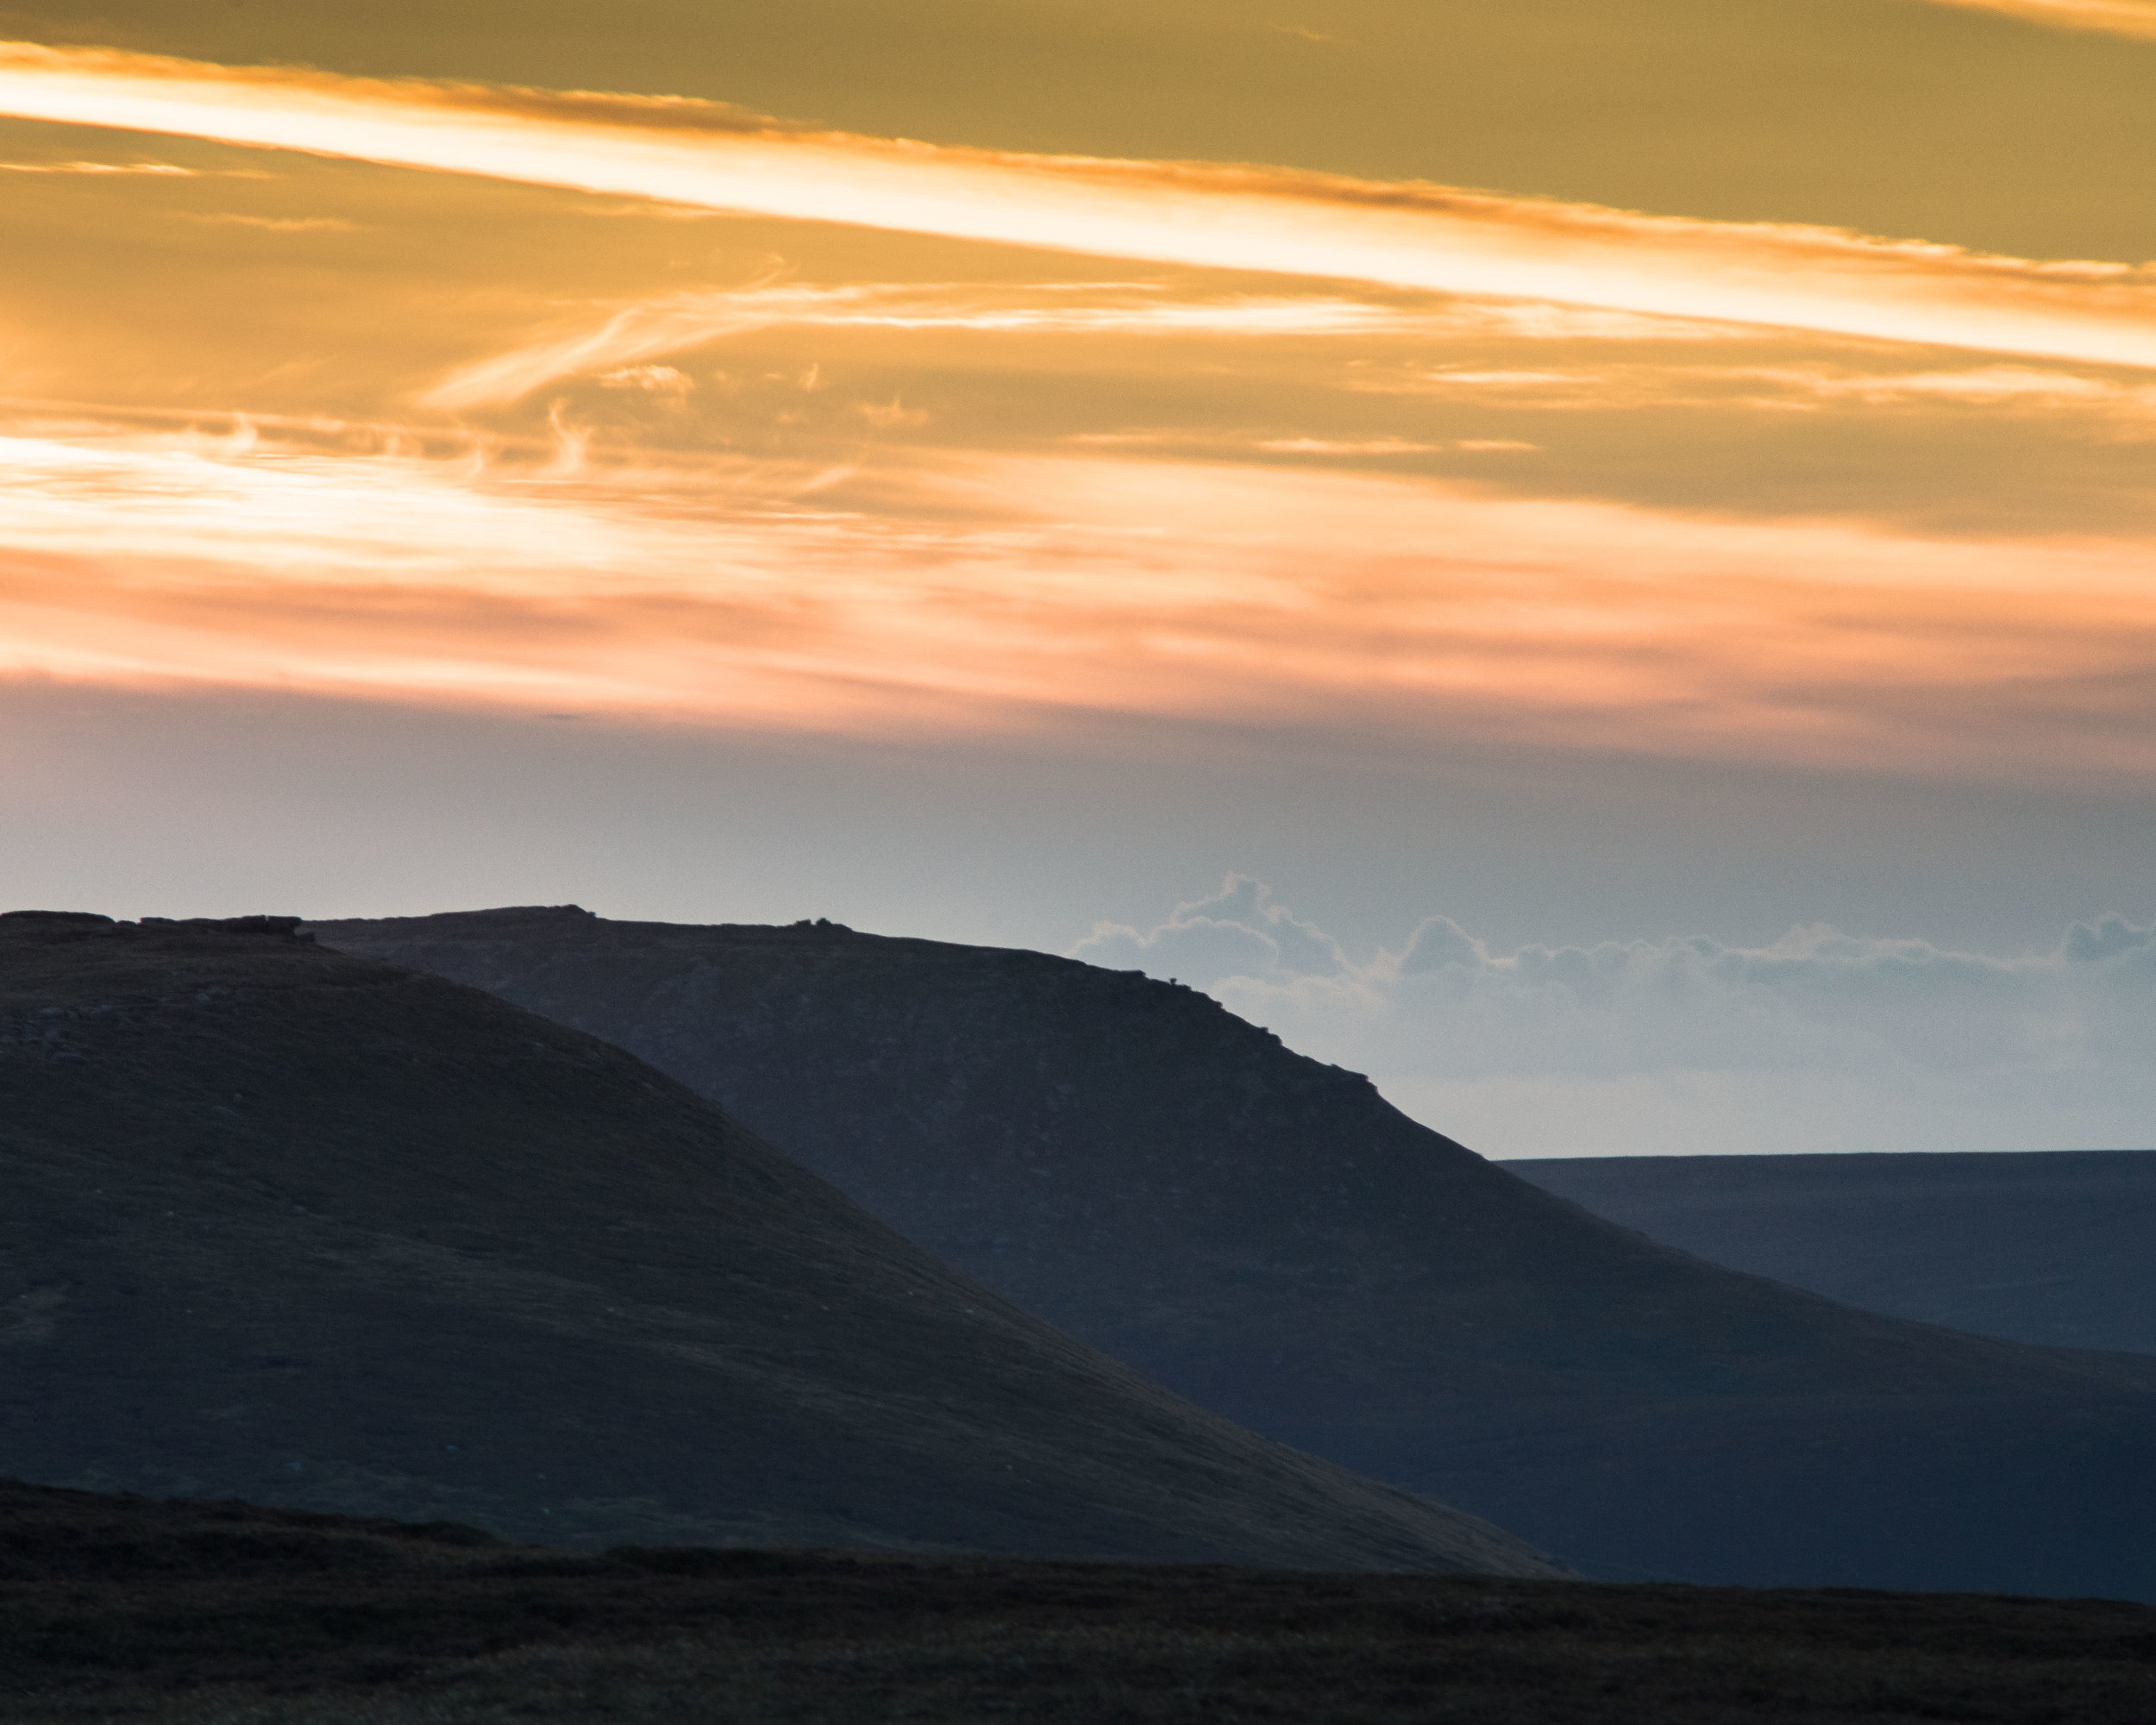
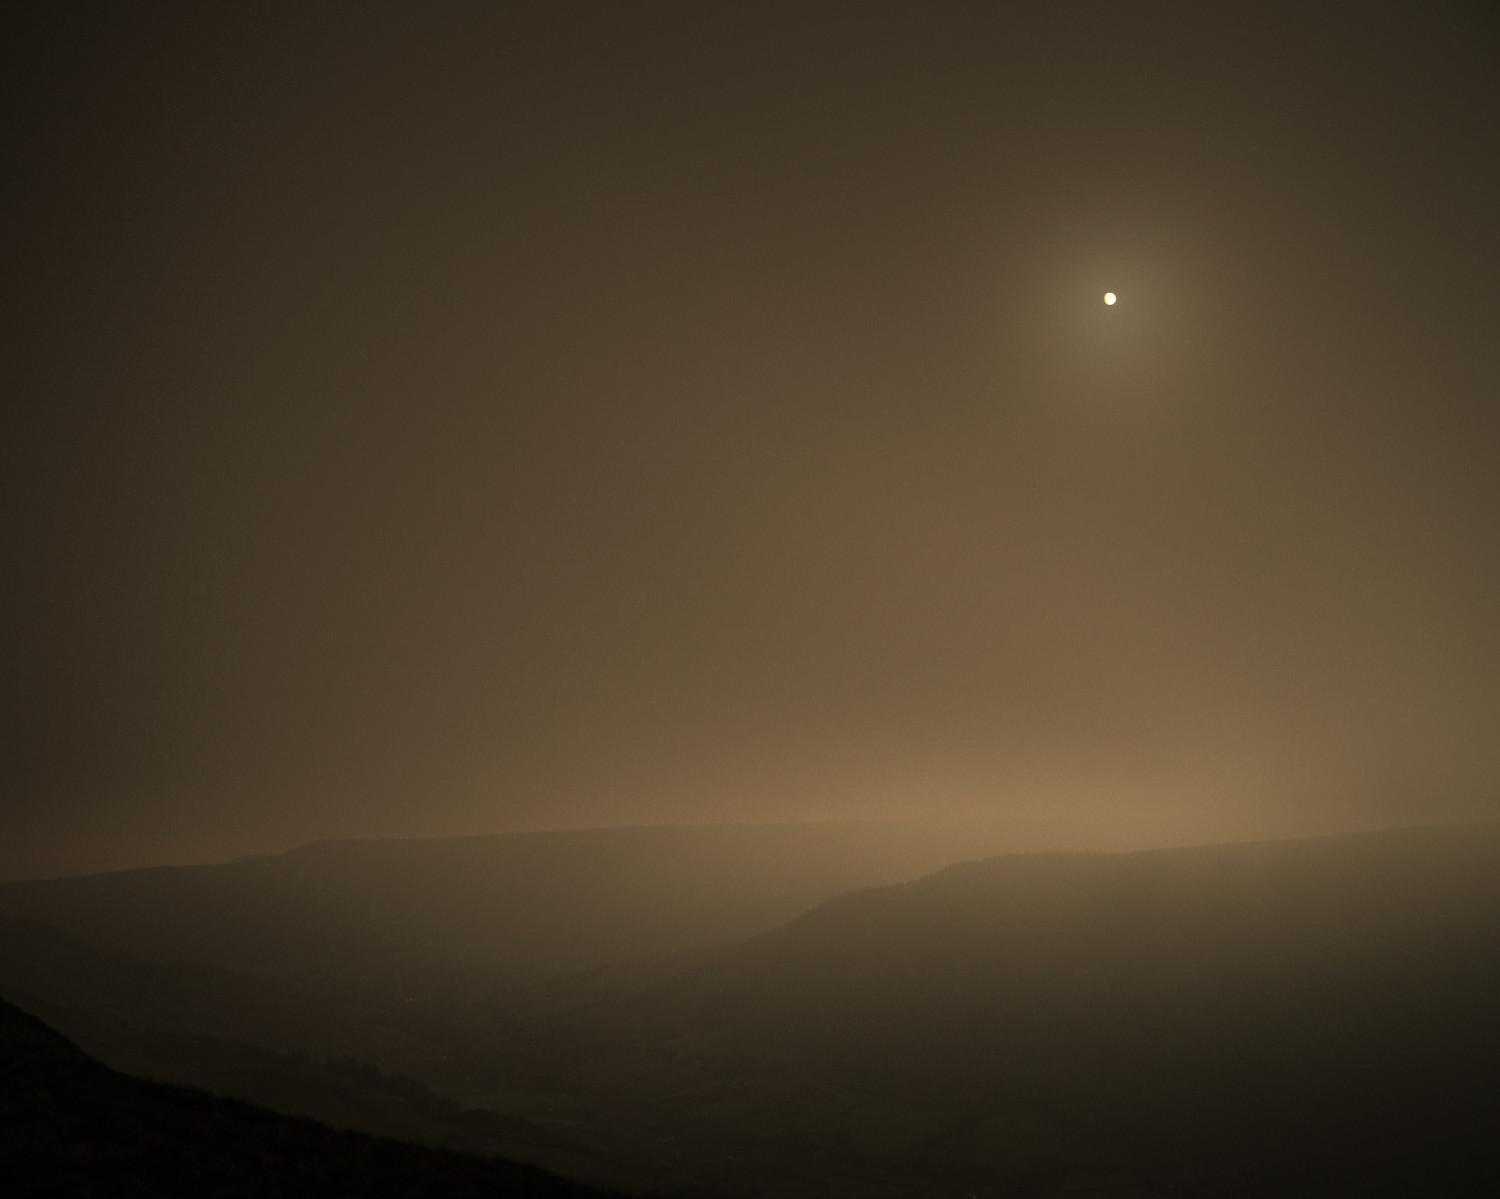
This ethereal scene was only captured due to wild camping and emerging from the tent at 2.30am.

Wild Camp - I have to admit that this is something that I have only started to do in the last couple of years, but I have to say it makes total sense and I wish I’d done it years ago. As a landscape photographer we are always looking for the best light and most of the time this can be found at the start or end of the day. As an example fort me to catch a sunrise in Derbyshire in the summer months I would have to leave home at around two thirty in the morning. This is obviously impractical. Wild camping allows you to travel to a location in the afternoon, catch the sunset and then be at your location for sunrise the following morning. So, not only do you get two chances for getting a shot you avoid the stress of rushing to get to that location before the sun rises or goes down, perfect. As always when wild camping you should consider it a matter of pride to leave your campsite as pristine as it was before you arrived.

The humble L-Bracket - Such a simple bit of kit but one that you will wonder how you managed without it after your first use. An L bracket is simply what it says, an L shaped bracket that fits around you camera body and takes the place of the tripod plate. This enables you to very easily move the camera from landscape to portrait mode. You must have taken a landscape image and thought that it would look better in portrait mode, so you undue the friction nobs and drop the ballhead sideways to take the portrait shot. Alas you can’t get it level and the ballhead seems to keep letting the camera drop slightly. Sound familiar? The L bracket does away with this, set up the landscape shot, take it, undue the camera from the ballhead, flip it over, tighten and shoot the portrait image. If your not already ordering one on Amazon! Why Not!!

Top ten landscape photography tips by scott tilley

Sun Compass

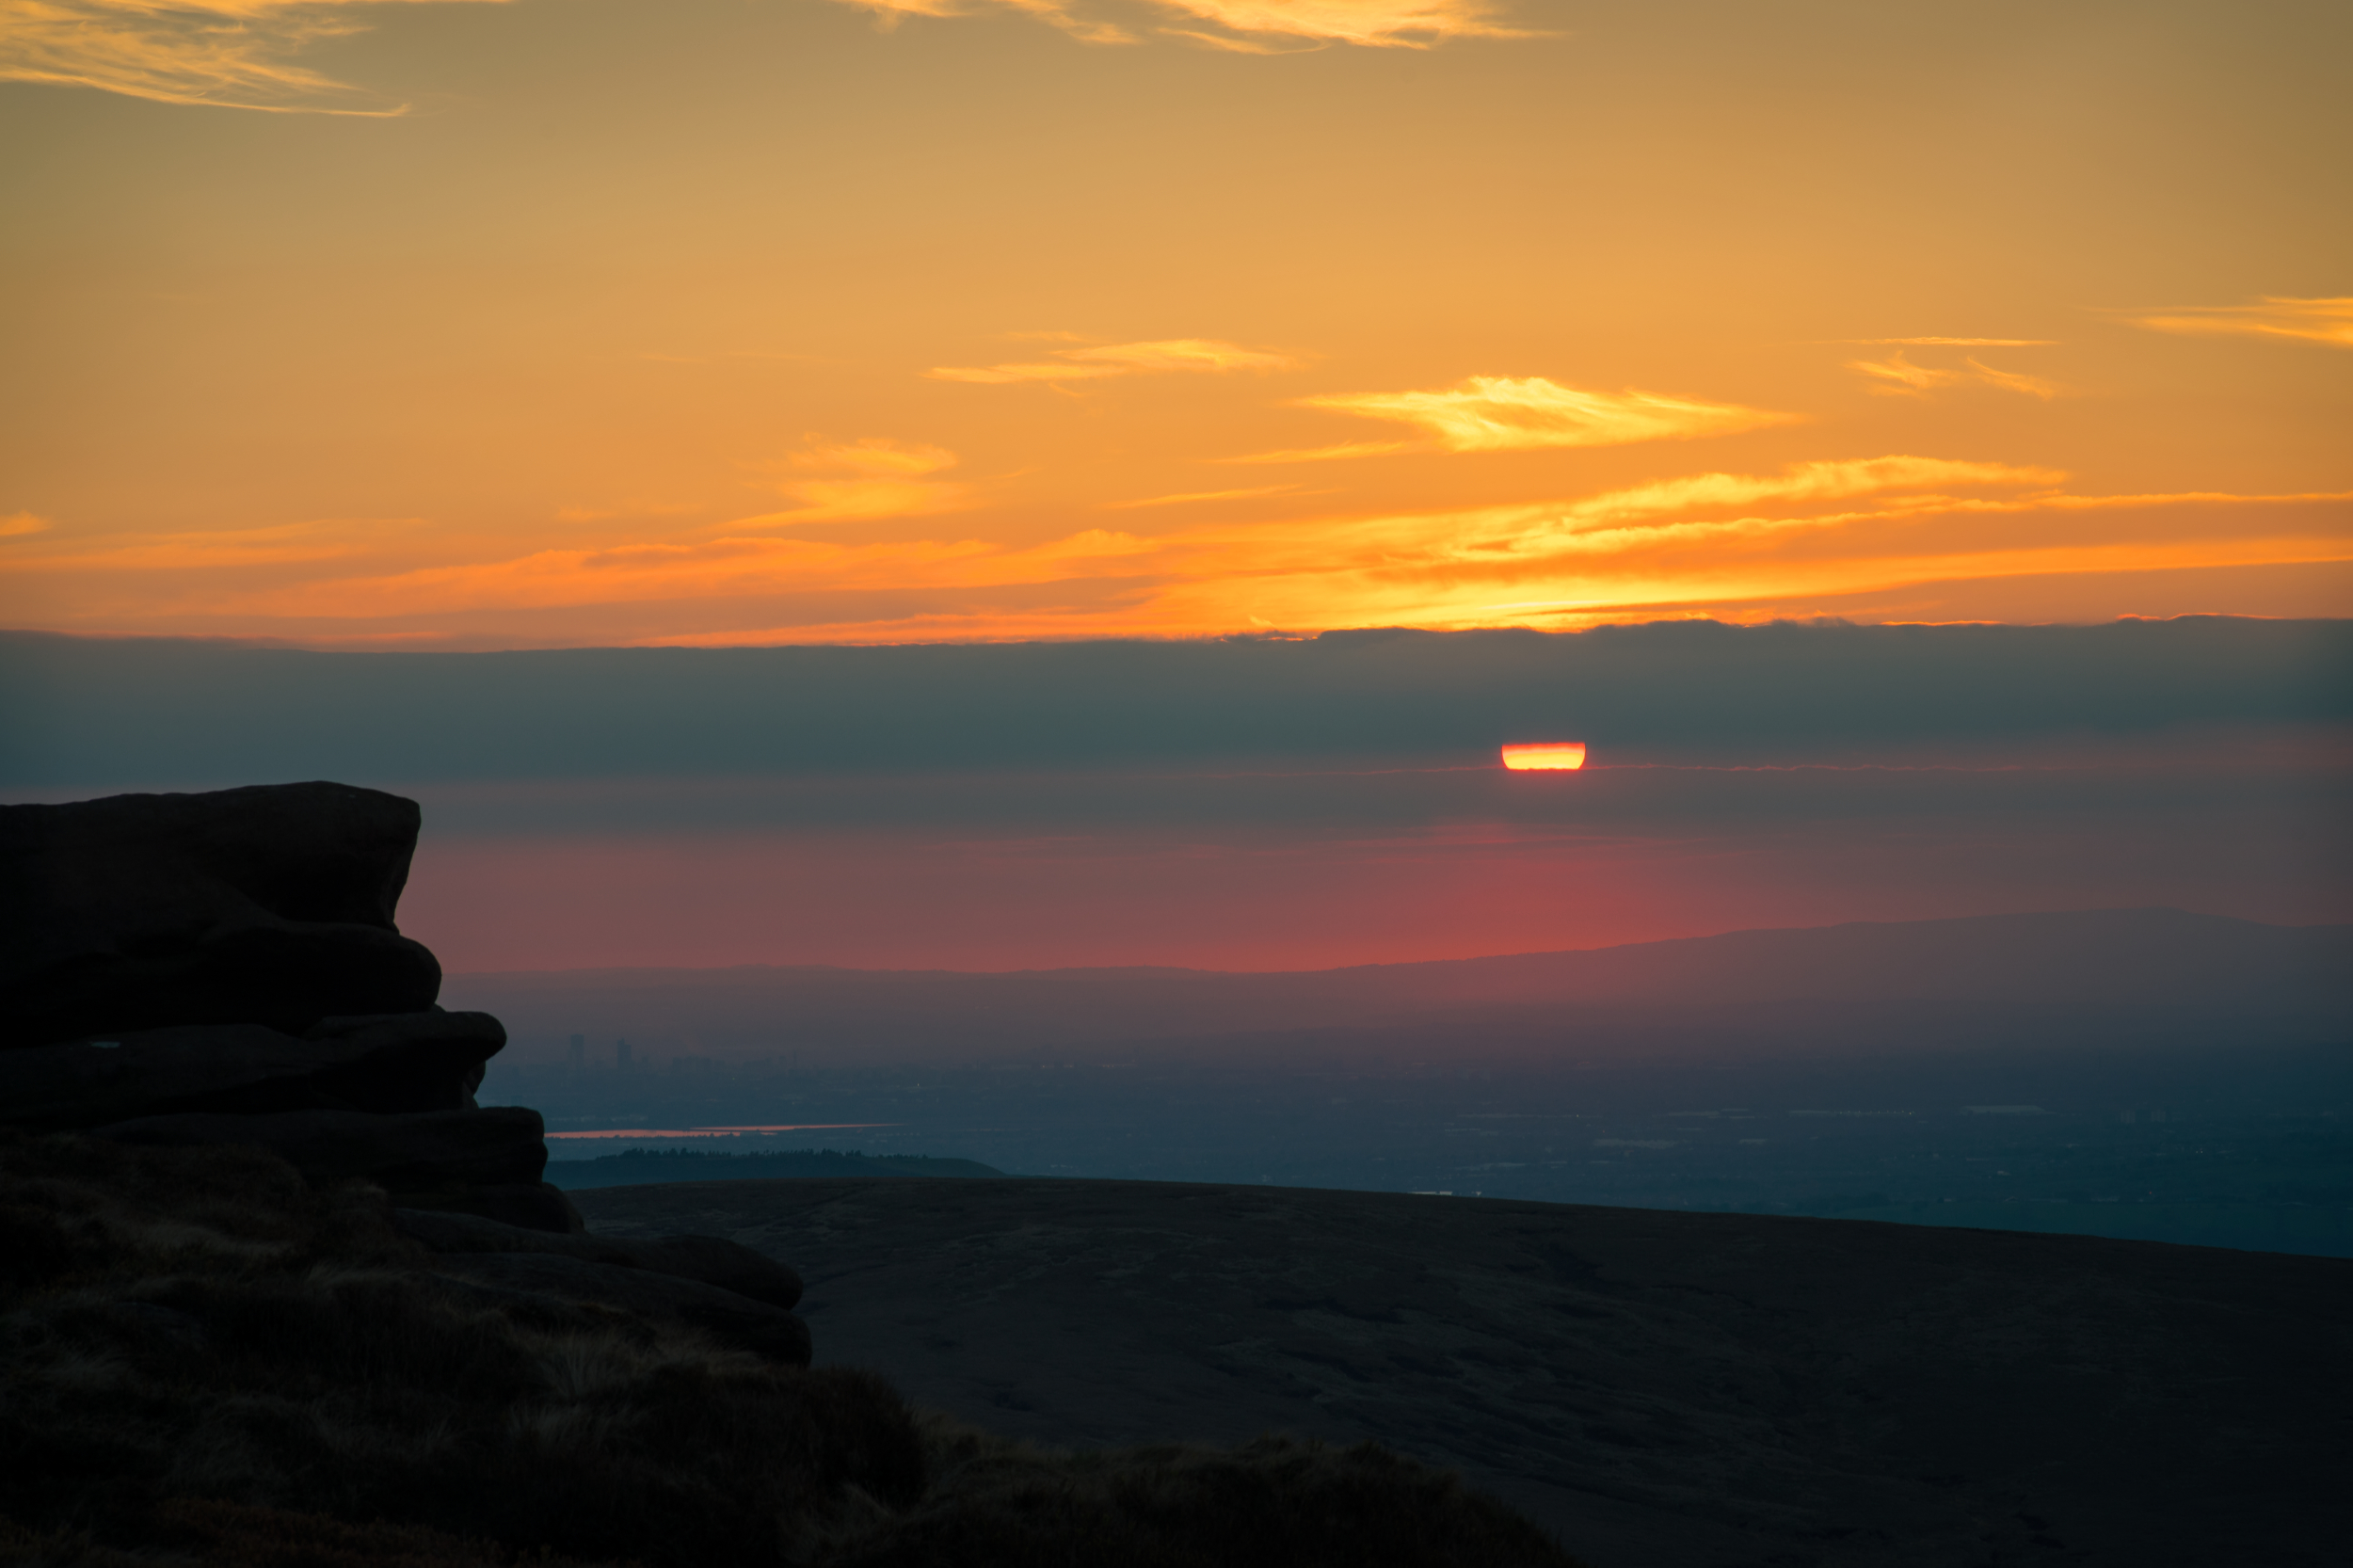
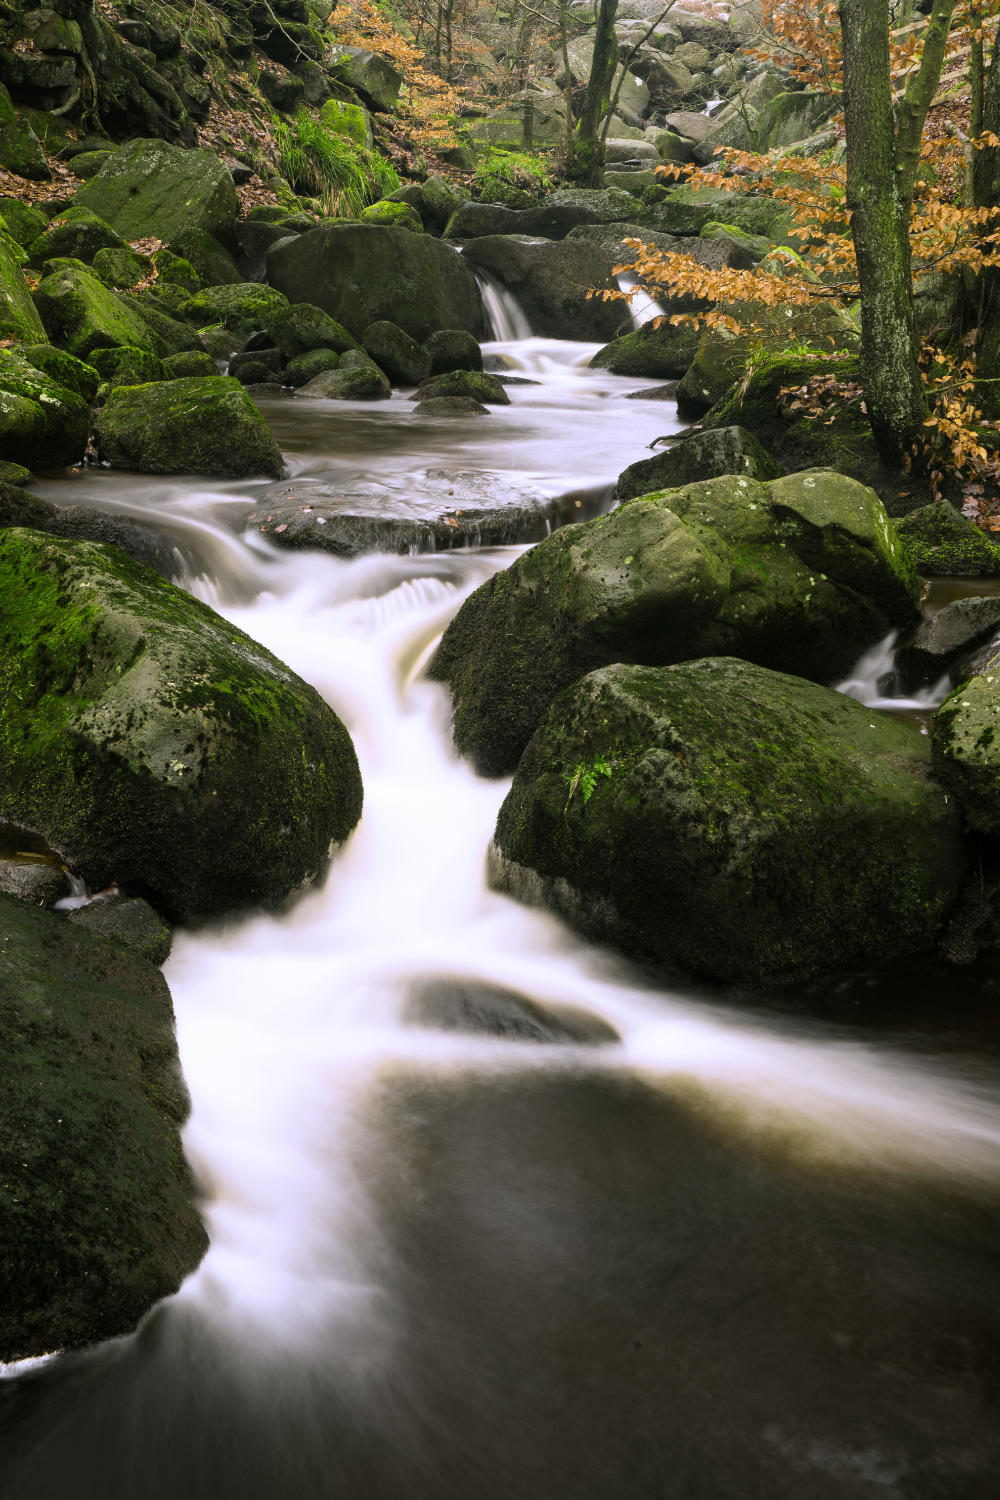
We got exactly the shot we wanted here because we knew in advance where the sun would go down. We Couldn’t predict the cloud that set on fire but we had maximised our chances of getting the shot.

Get a Sun Compass - Now we all know that the sun rises in the East and sets in the West right? Well not quite! If you consider my second point in this list, to remind you to work a location. One of the main points here is that locations look very different at different times of the day, in differing light and when that light comes from changing directions. I actually learnt this lesson very early on when I visited a location and the success of the shot required the sun to rise in a fairly exact position. All the other effort had been put in and I got to the location in plenty of time, the sun came up and hang on it was almost twenty degrees away from where I expected it to be. As a rule of thumb you can say that during the summer months the sun almost rises in the North East while in winter it can be found peeping above the horizon in the South East. A sun compass allows you to see exactly where the sun will rise and set for any given time of the year so there’s no excuse for not getting the shot. Finally I would also add that you can now get apps for your smartphone that do exactly the same and will even use the phones camera to physically show you the suns position on any given date. Although I have used these I still stick with the physical compass as that doesn’t need a mobile signal!

Top ten landscape photography tips by scott tilley

Bright Sun Shoot!

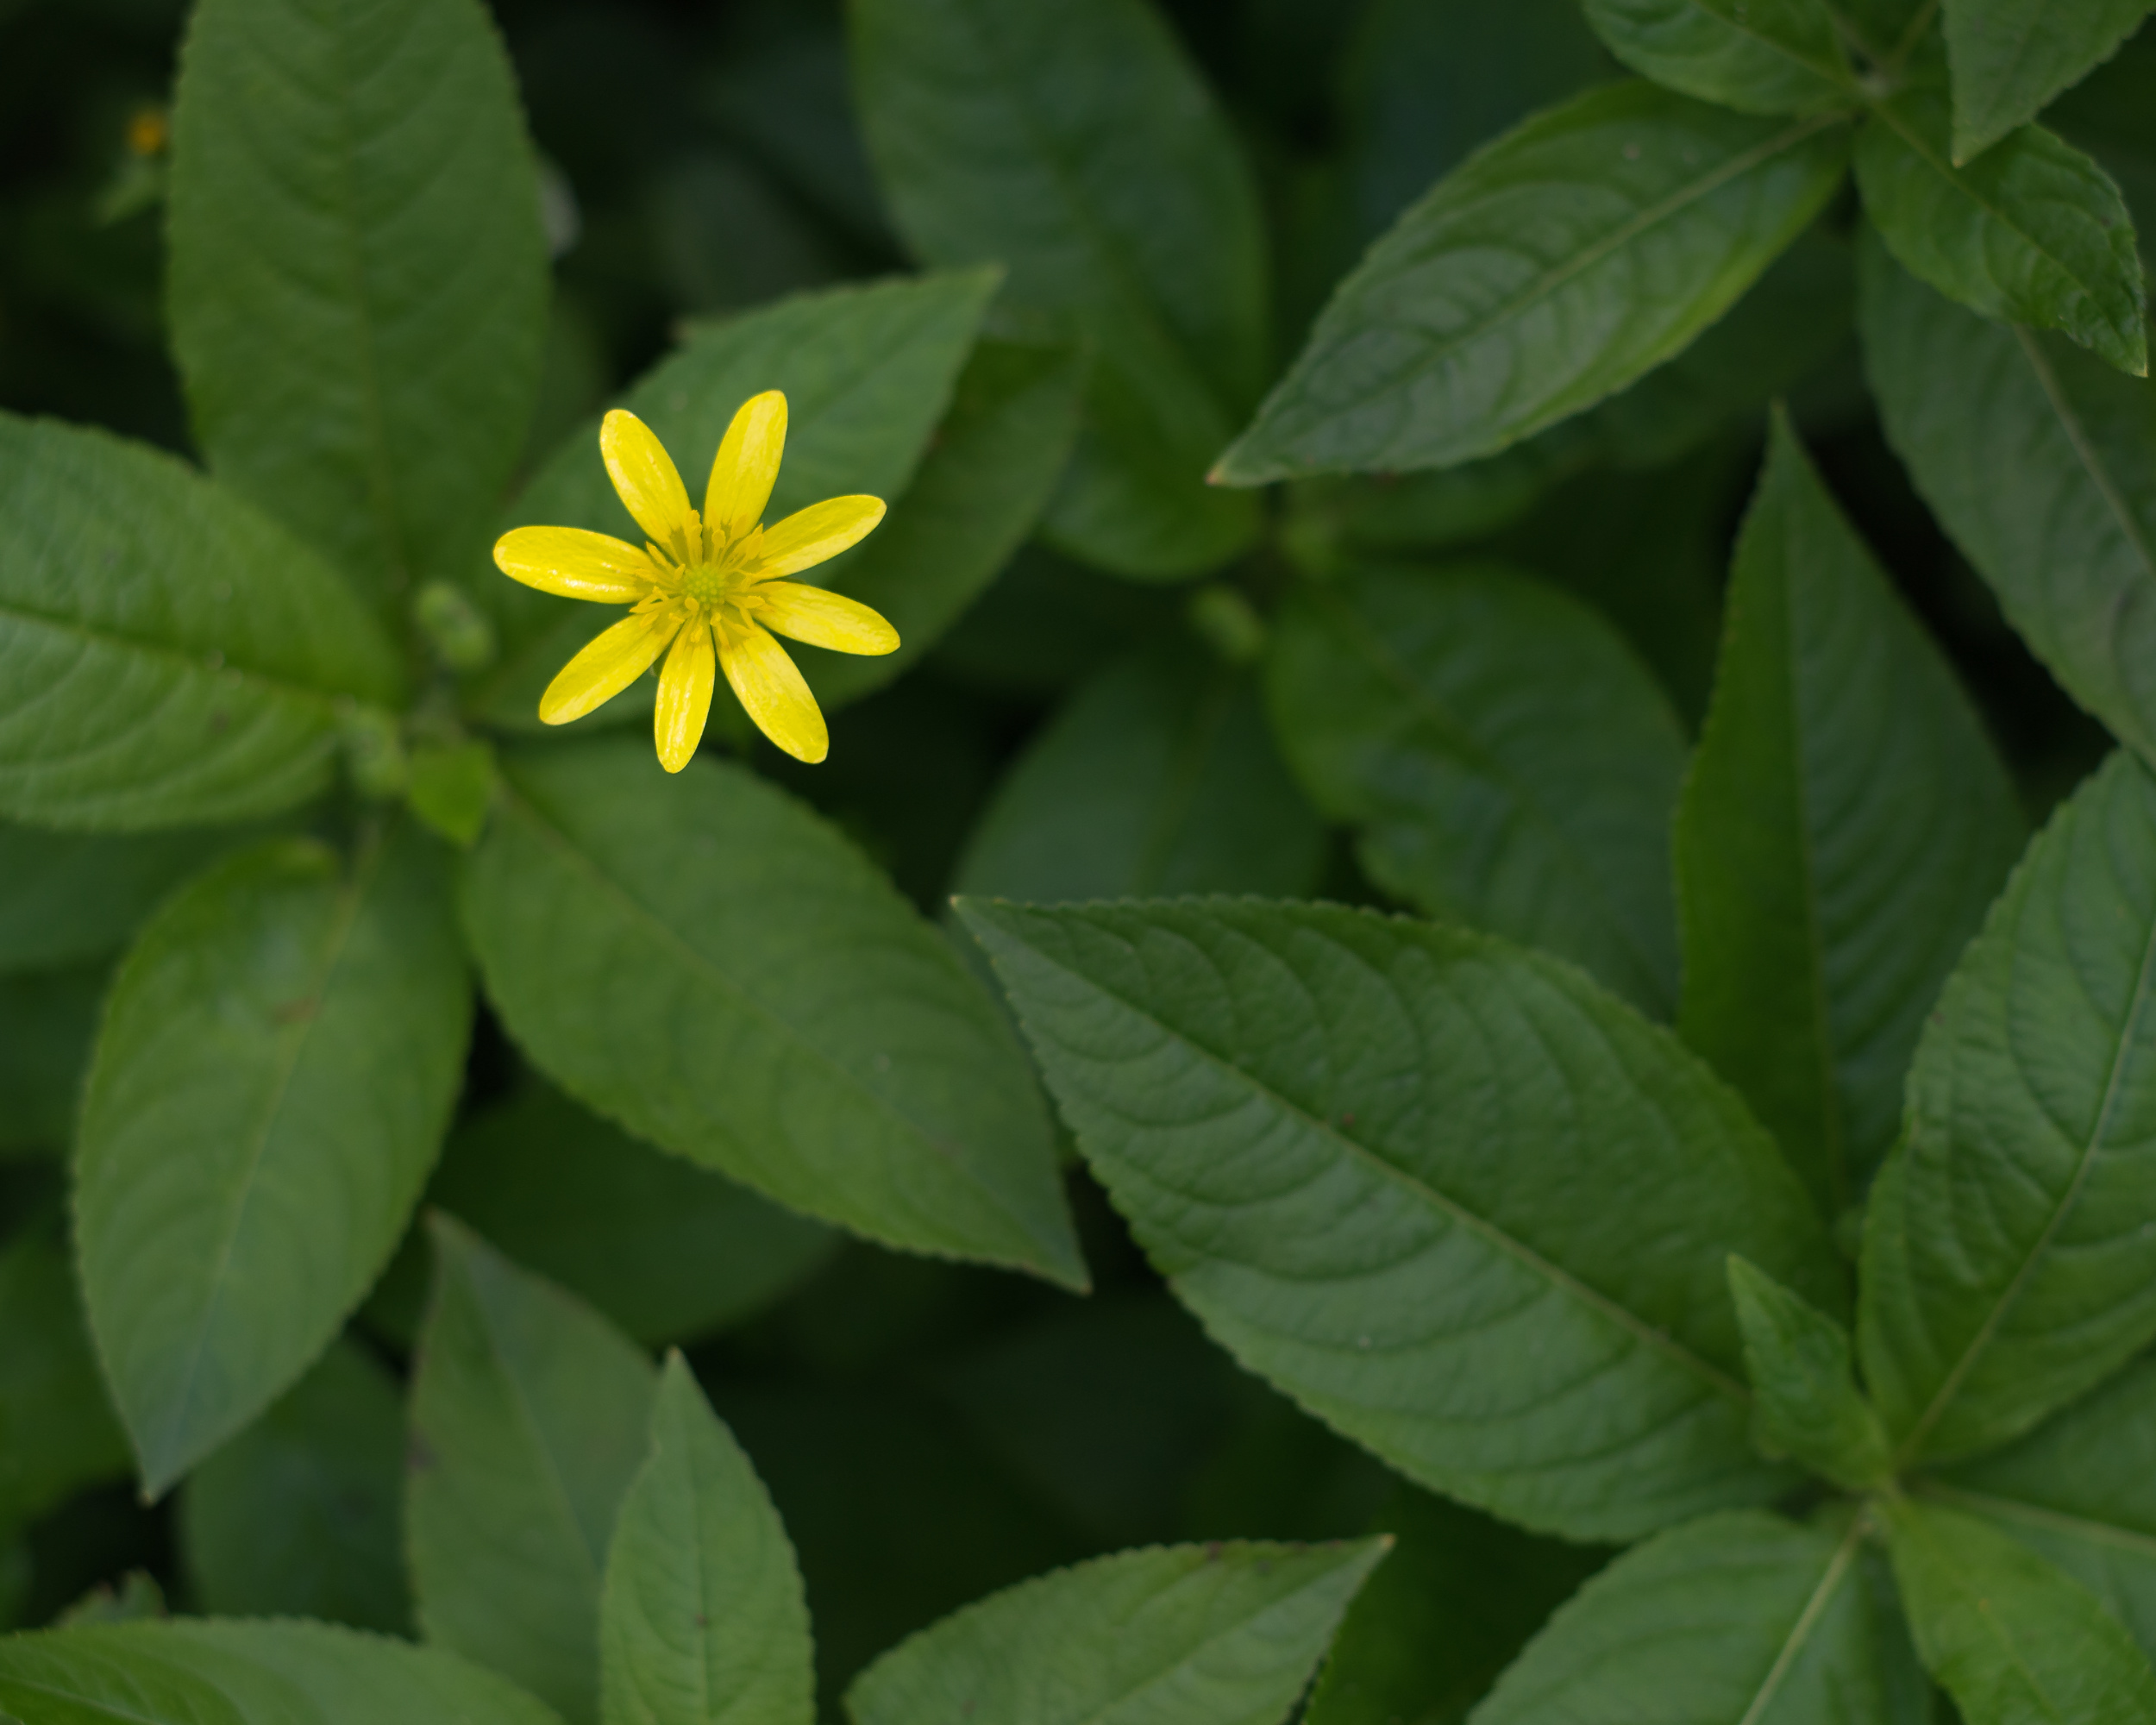
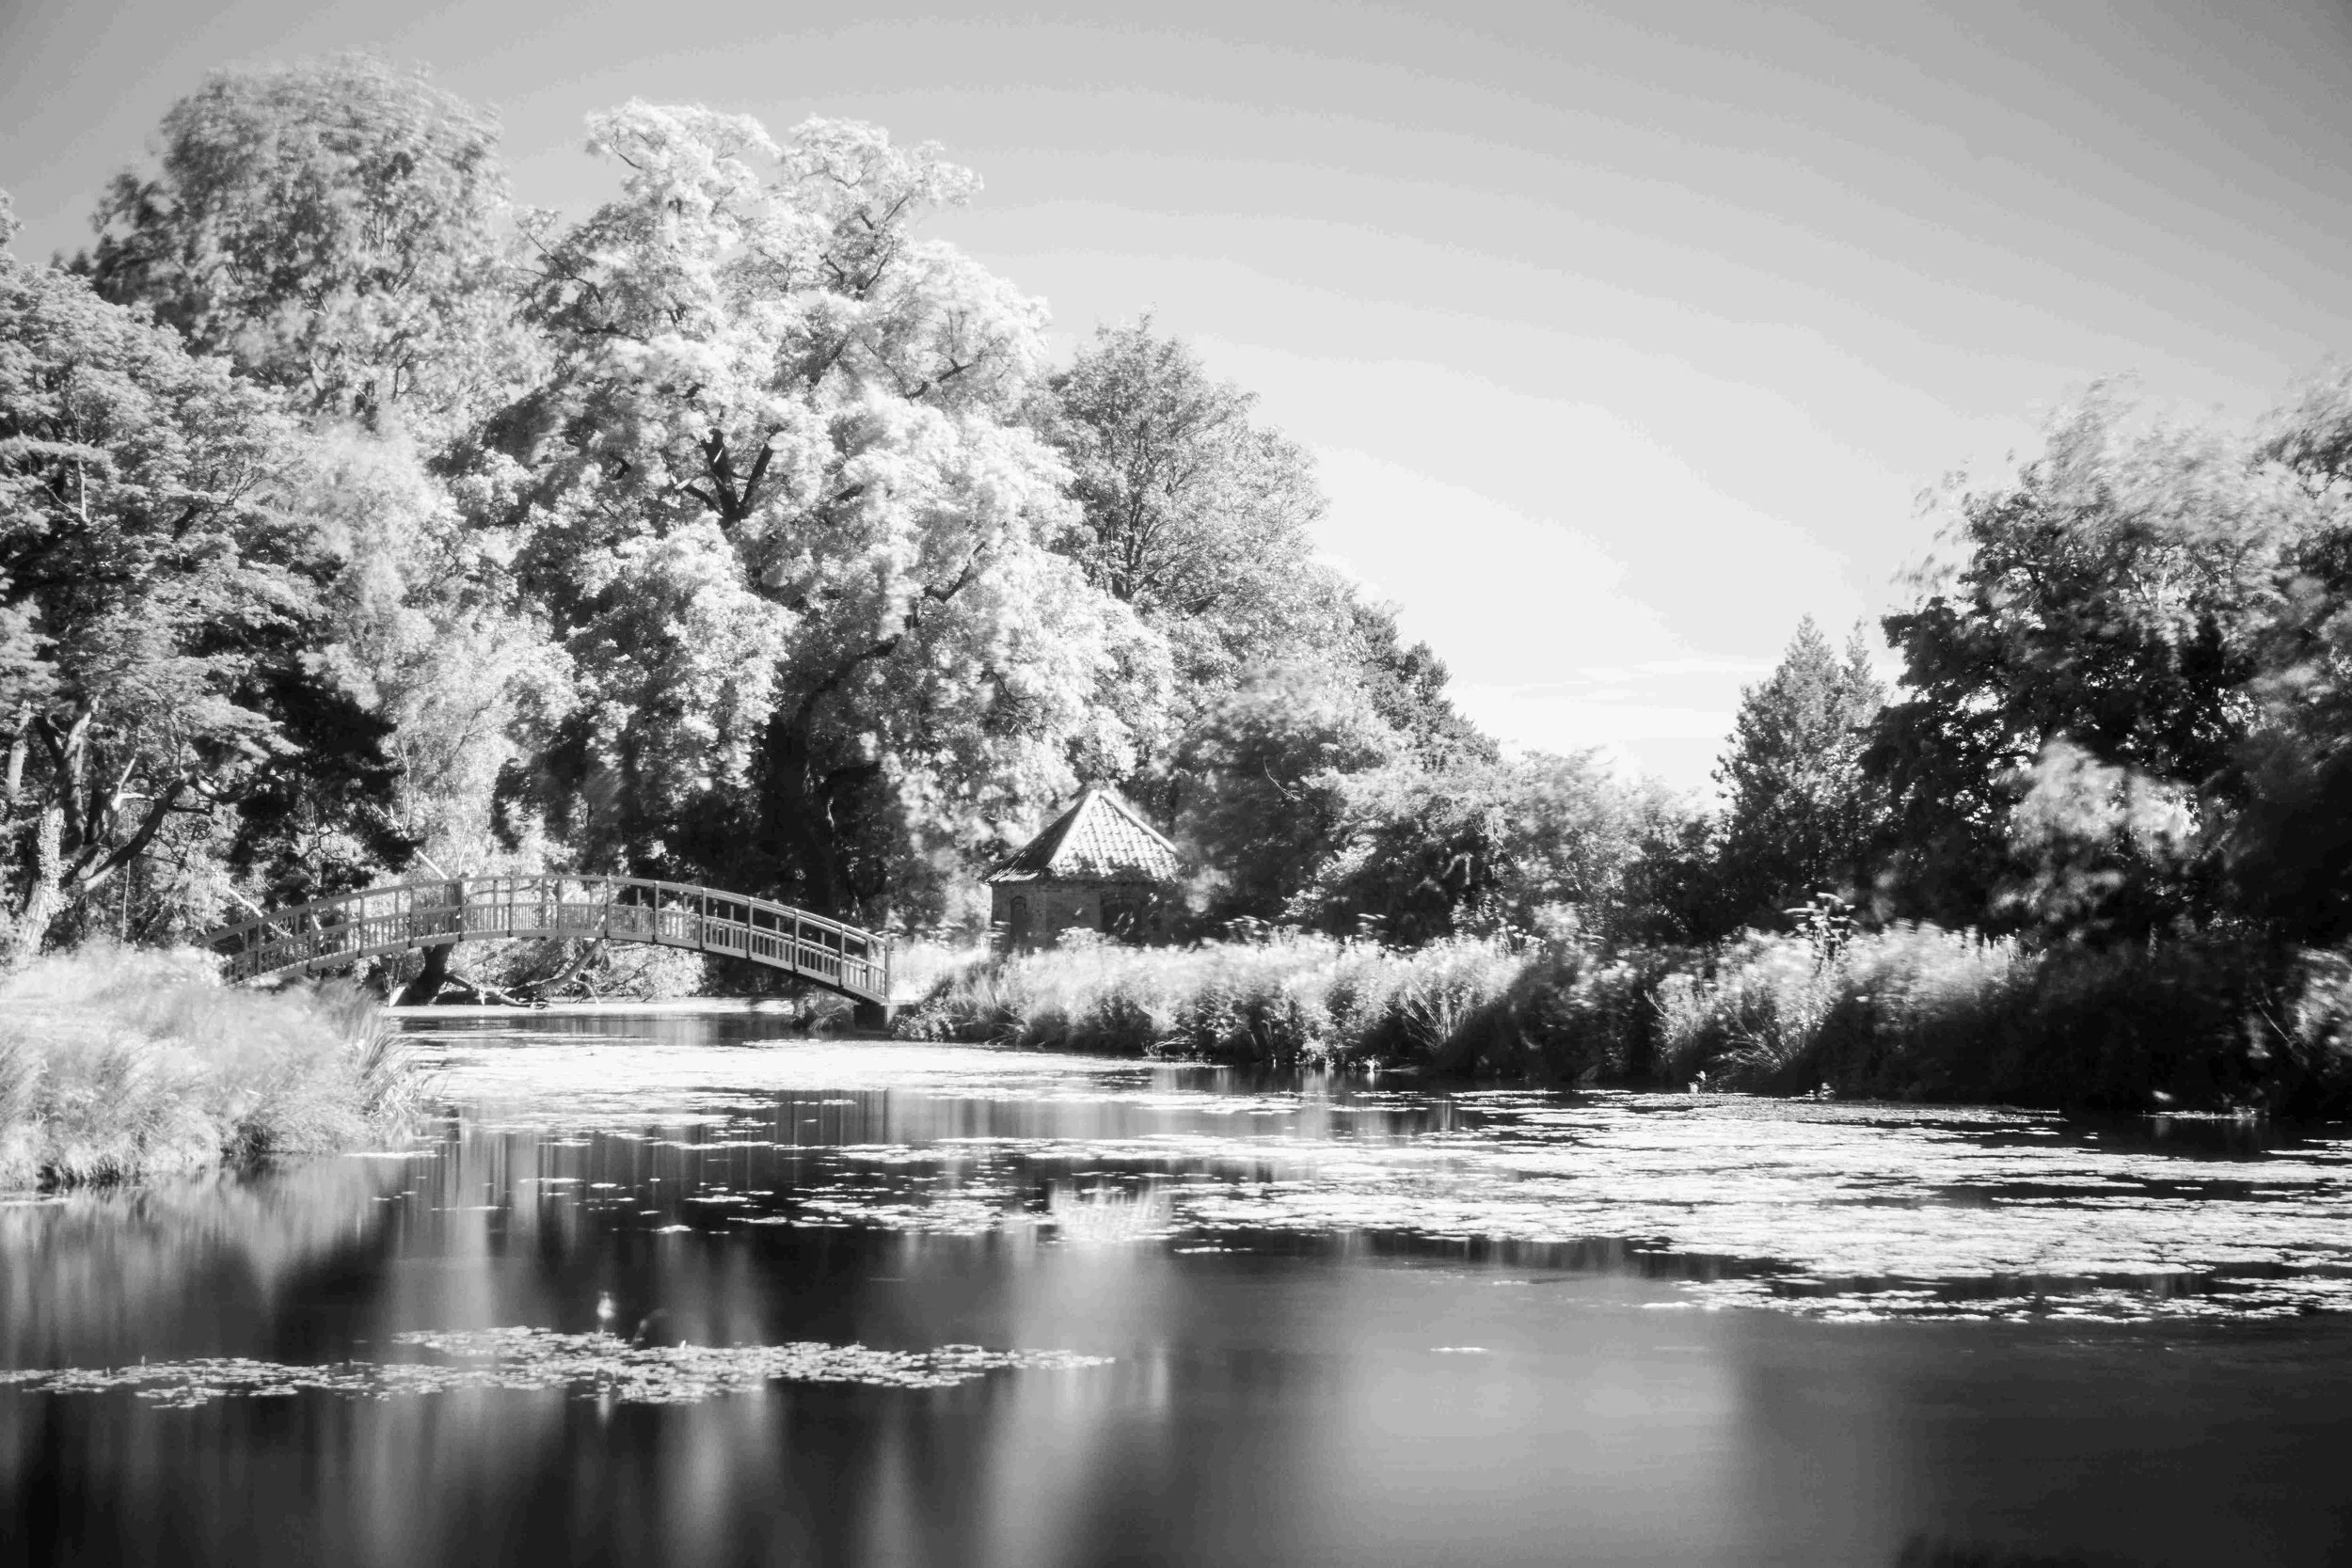
I switched to an Infrared filter for this shot as it was taken in the middle of a bright sunny day.

The Polarising Filter - Because we mainly shoot digital the need for a massive array of filters has largely been superseded. Most techniques can be replicated during post processing or the digital darkroom as its now called. This is the one filter that cannot be replicated digitally and its the one I always have in my bag. So what does it do, well for me it has a number of uses. The first thing to note is that it works best when at ninety degrees to the sun, that is the effect will be at its most dramatic on your image. When shooting water the polariser can be turned to remove reflections from the surface of the water enabling you to get a clear view of the rocks and interest on the bottom. I use it for this reason but also when shooting a sky that has dramatic clouds or clouds that show some drama a twist of the polariser enhances the drama by darkening the dark cloud and contrasting it with the lighter ones. It really can have the effect of transforming a nice, well composed image into one you would gladly hang on the wall.

Don’t be ruled by the Weather - This could be a controversial one as I know as a landscape photographer we often obsess about the weather. I also do this but I want to try and convince you that this is for a slightly different reason, and for your photography its probably an unhealthy obsession. I think we are so weather lead in our photography because we have a location in mind and we have an image in mind for that location. And the image in that location requires this weather, right? Does that describe you? I know it has done for me in the past. But if you stop to think for a minute what that is doing. It is blinkering you to all the other possibilities that a location may have to offer. To prove my point I would say this. I have done a lot of wildlife photography in the past and I have planned something so that nothing is left to chance. You have watched a particular animal in a field for over a month, you have noted its behaviour, what it does every day. You have built a hide in just the right place, you wait until the wind direction is just right so as not to give up your location. You sit in the hide for twelve hours and nothing turns up. Now in that instance you can keep coming back but the animal may never come back to that field so there really is nothing you can do. You may say this is the same with the weather, however this is not the case. As a landscape photographer you have so many other options at a location if you don’t get the weather you want. Would changing the composition suit these conditions? How about changing the subject altogether? What about an intimate landscape shot. Maybe the sun is just too bright, what about infrared? Maybe its just cloudy and dull so what about a monochrome image where you have to use lines and texture to make the image, Or maybe a minimalist shot? Just get out there and work with what you’ve got and be creative!

Remember the rules, then forget the rules! - You may often of heard tell of the “Landscape Photography Rules”. These mythical rules tell us to use the rule of thirds, use odd numbers rather than even and of course you must shoot at the golden hour. For me these rules have always been more like guidelines. What I would say to you is that if you follow them it will lead you to some very nice images. What you must not let it do is blunt your creativity. We have all heard the saying that rules are meant to be broken and in photography this is certainly the case. Be mindful of the rules but never fear to break them!

Top ten landscape photography tips by scott tilley

Enjoy

Above all, simply enjoy your photography and the natural world around you. Sometimes it’s nice to forget the camera and just gaze in awe!

Enjoy Your Photography - This is a surprisingly easy one to forget and I can include myself in this category. I spent years taking wildlife images almost exclusively. After nine hours in a freezing hide with nothing turning up to photograph I finally realised that I just wasn’t enjoying it. For me it took a period away from photography to rediscover my passion and now when this feeling comes to me again I no longer need to walk away from this wonderful hobby, instead I switch genres and try something completely new or go back to something I enjoyed in the past, and yes that does include wildlife photography!

I hope you have found this short list of tips useful if you have please leave me a comment and I would be really interested to hear any photography tips you may have that didn’t make this list.

If you would like to join me for a days one to one photography tuition please find more details by clicking the Learn More button.

The Exposure Triangle Explained

From the last year of working with photographers on a one to one basis the area that seems to cause confusion more than any other is that of exposure and how to control it.

This may be because the first thing I ask a photographer to do when we start the session is to change the camera setting from that wonderfully comforting AUTO to the rather foreboding MANUAL setting. All of a sudden all the decisions are taken away from the camera and creative control is given to the photographer. This may seem scary at first but as I try to explain the camera in auto mode is rather like riding a bike along a straight road with stabilizers on, all very nice and pleasant and yes it may be enjoyable but it never gets above that, it leaves you wanting more. Manual mode however is the exact opposite, more like a twisting downhill mountain bike ride through trees and over rocks, dangerous but the ultimate thrill ride.

So, what is this mystical magic that we now have to deal with, well there are only three ingredients and how much of each we use will effect the overall look of the end result. Firstly lets look at each individually and discuss what they do.

The exposure Triangle explained

Slow Shutter Speed

Here a slow shutter speed has been used to purposely blur the water to give a milky effect

  1. Shutter Speed Self explanatory really but this is how long the cameras shutter remains open. I like to think of the shutter as curtains overa window. If you open the curtains and shut them again very quickly only a small amount of light will enter the room beyond, do the opposite and keep the curtains open for a couple of seconds and much more light enters the room. So on a camera a shutter speed of 1/1000th of a second would let in very little light while a shutter speed of 1/10th of a second lets in much more light. In manual this is now one of the weapons we have at our disposal to create our images.

  2. Aperture To explain aperture to photographers I tend to use a variation of the same analogy. This time I try to get them to think of two windows into an empty room. If the window is tiny then only a small amount of light can enter, yet if the window is large a vast amount of light will enter the room. You may now be able to see how this can link and work together with the shutter speed above. On a camera, and confusing for photographers, an aperture of F4 is a very large window letting in lots of light, while an aperture of F16 is a tiny window and lets in very little light. As I say confusing because the bigger number equates to the smaller window! With me so far?

  3. I.S.O. Now I suppose this is the one that photographers can have the hardest time understanding. Older photographers may have an advantage here because ISO relates back to the old film camera days (remember those?). When film was the medium used it would come in different sensitivities. Someone going away on holiday in the 1980's would probably have purchased film with 24 shots and ISO 125 or 200. This number relates to the sensitivity of the roll of film. So back in 1984 if I shot one image at Shutter speed 1/200sec, Aperture F11 and ISO 125 and then another straight after Shutter Speed 1/200sec, Aperture F11 and ISO 200. (Don't forget in 1984 I would have had to change film or have two cameras to do this). The image in shot number one would be darker than shot number two simply because the film in image two was more sensitive to the identical amount of light entering the camera.

    Today nothing has changed. You can change the ISO in your camera settings and this does exactly the same thing. Your cameras sensor has replaced the film and lucky for us the sensor can be sensitive to multiple different ISO's at the touch of a button. So unlike film you do not need to remove the camera's sensor when changing ISO.

The exposure triangle explained

Large Aperture

Shooting at F4 keeps the girl in focus but blurs the foreground and background to make her stand out.

Ok, they are the three settings we need to adjust to in our triangle of exposure. Now we need to explore why we would bother to mess around with them at all? Simply put if these three ingredients where in a cake varying the amounts of any of these would vastly effect the taste of the cake. And each of these ingredients effects your image in a different way. Lets take a look at each and what its effect on an image can be.

The exposure triangle explained

Night Shot ISO 2500

Shooting in the dark and using a high ISO to gather the small amount of light available from the stars

  1. Shutter Speed in its simplest form the right or wrong shutter speed can mean the difference between a blurred and sharp image. As an example you are at a cycle race and as the riders come by you want to get a sharp shot as they pass you. At a shutter speed of 1/10th of a second the shutter is open to let in lots of light, however in 1/10th of a second the riders will have moved in front of your camera lens. If the camera was hand held then it may well have picked up your movement resulting in a blurred image. If we use a shutter speed of 1/400sec the riders will not have moved in such a short period of time and it would also prevent your movement showing up in the final image. Obviously this also has creative implications as you may want to use a slow shutter speed and pan the camera to give that impression of speed. Suffice to say I will cover that in another article.

  2. Aperture The effects of varying apertures in photography are again fairly easy to understand. This may be another photography term you have heard "Depth of Field". All this means is the amount of the image from the foreground to the background that is in sharp focus. Landscape photographer in particular like to use settings of around F11 (small aperture, letting in very little light). The effect if this is to give a foreground and background in focus. So an image of a mountain with a lake in front of it and a rock on the bank nearest the camera should all be in focus if we focus the camera a third of the way into the picture. However if you shot the same image and again focussed a third of the way in but at F4. The rock and the mountain would be out of focus. This is an easy one to try yourself. On a table place objects close to the camera and then further away on a diagonal so you can capture all the objects in one shot. Now focus on an object a third of the way in and try different apertures. See what I mean? Creatively this is also a useful tool. Portrait photographers love to have a subject in sharp focus but with a gorgeously out of focus background to isolate there subjects and make them stand out. Again this will be looked into further in later articles.

  3. ISO Differing the ISO setting of your camera basically increases or decreases the cameras sensors sensitivity to the light entering the camera. As an example this would be a useful tool if you where shooting a sporting event inside where light levels may not be the best. As discussed above you are likely to want a high shutter speed to freeze the action, but as we know this will decrease the amount of light, not what we want in an already dark environment. We can open the aperture wide but this may not be enough. Incidentally this is why professional sport photographers can often be seen with huge lenses both in length but also width. The width is obviously that (BIG WINDOW) to let in the maximum amount of light. As you can imagine with a normal set up the size of the aperture may not be enough wide open to let in enough light. It is then that you can look to increase the ISO (sensitivity of your sensor) to light. ISO 800 as an example may be used. One thing to note is that much like film increasing the ISO does increase the grain size of the image or the dots that an image is made up of will be bigger the higher the ISO. You will often hear photographers talk about "Noise" in an image and this can be due to increasing the ISO. Again this has creative implications which will be discussed in further blog articles.

I hope this short explanation has helped your understanding of the triangle of exposure and how we can manipulate each element to get a correctly exposed image and use it creatively to tell the story we want to tell. Please let me know if you find this type of blog article useful and if there are any other areas of photography you would like me to explore. You can leave me a comment or contact me via the contact page, and if you want to progress your own photography why not join me on a one to one basis for a days tuition? More details can be found by clicking the button below. See you soon.

Whats Been Happening!

You might be wondering what has been happening with the website and the Blog over the last few months, so here is an update on why all has been quiet!

DSC02605-Edit.jpg

As some of you will know as well as being a passionate photographer I also enjoy health and fitness. Sport for me really began when I took up road cycling in my late teens. As I got older this morphed into duathlons and triathlons. During this time I also took up digital photography. A strange combination I know but they never seemed to run at the same time. What tended to happen was that I would be in triathlon mode, train too hard, burn out and go back to photography. Put on weight, decided I needed to get fit and go back to triathlon and the process would repeat. Now a couple of years ago I really thought I had done with triathlon. I either got injured or put to much stress on myself for that A event, it was never fun (hence the shout of other club members that I was never smiling when I came into the finish. Why? because I was always trying too hard)

However, just as I began to throw myself back into landscape photography, I hit fifty and perhaps some would call it a midlife crisis but I signed up for the Outlaw. Now the Outlaw is Nottinghamshires very own Ironman triathlon. My reasons for entering where simple, I had never done the full Ironman distance before and I am determined to do it this time with a smile on my face. I also wanted to stop the cycle of photography and training and run them both together. So far this does seem to be working. Ironman training is pretty intense and I am currently doing around seven hours training per week but this will rise as the July 2019 race date gets closer.

FB_IMG_1548163581409[3210].jpg

The New Bike

2.4 mile swim, 112 mile bike, 26.22 mile run

This limits my time out with the camera, however, it really does give you something to look forward to after the hours of swim,bike,run. I don't intend to use this site to give updates of my training and kit choices as that's a whole different area and I suspect few of you follow the path I do. (I would be intrigued to know if there are others!)

Photography wise I have decided to take a hiatus from the running of my Youtube channel as it really does take up a lot of time and can impact on the quality of images you produce as you get bogged down with sound quality and filming. Needless to say I had hoped this would free up some free time for personal photography projects but this coincided with a flood of product photography jobs and days out teaching.

Anyway, this is a short update just to let you know where I'm at. I recently uploaded an image taken at Morton Castle in Dumfries and Galloway, this is located in the night sky gallery so please take a look and let me know what you think.

I will speak to you soon.

Scott.

The Sony A7ii and Legecy Lenses.

So you spend a thousand pounds on a Sony A7ii mirrorless camera and then stick a fifty pound piece of glass off Ebay on the front. Can that really make any sense? Is it really possible to use old glass on a modern camera and get stunning results or are you throwing good money after bad? Well being the thrifty sort I set out to find out.

I bought my Sony A7ii earlier this year (2018) Already you can see my leanings towards saving money by not forking out on the already released A7iii. For years before I had an association with Canon apart from a brief fling with Nikon. My attraction to Sony, apart from this being my first full frame camera and the stunning results I was seeing from other photographers came from the whispers I heard that the Sony was really rather good when used with old lenses pre the year 2000. Lenses that where predominately designed for film cameras. Obviously I wanted more proof so started doing my own research. It was obvious fairly early on that it was a mixed picture and as I dug deeper into the forums some clear favourites started to come out.

I suppose I shouldn't have been surprised, after all nothing really changes. Today we have new premium lenses that are soon labelled as awful while others which are at the budget end are suddenly very difficult to get hold of as photographers rush to grab a copy as multiple photographers sing there virtues.

By examining the forums I was able to come up with a few lenses that I thought would work well with my new camera. I had purchased the camera with the very expensive Sony 24-70 but I wanted a lens to use as my zoom tele-landscape lens as well as a couple of primes to keep things interesting.

From Left to right. Minolta 70-210AF (The Beer Can), Pentax SMC M 135mm F3.5, Pentax SMC M 50mm F1.7.

From Left to right. Minolta 70-210AF (The Beer Can), Pentax SMC M 135mm F3.5, Pentax SMC M 50mm F1.7.


Initially I was going to go with the Canon 70-200 F4 non IS but this was going to cost £300 and for a lens this price I would want to use it's autofocus so I could add another £100 for an adaptor. This was hardly keeping to my cheap legacy lens formula. So, going back to the drawing board and the forums it looked promising for two lenses. These where the old manual Canon 70-200 or the Minolta AF 70-210 (affectionately known as the "beer can") Well it was the beer can reference that swung it and I managed to pick one up off Ebay for the bargain price of £27 and with the cheap manual adaptor from Beschoi that came to an impressive £37.

To try out a couple of lenses on the prime side I plumped for a Pentax M 135mm F3.5 and a Pentax 50mm F1.7. Both these would use another Beschoi adaptor and the lenses where both under £30.

Right now for the technical stuff! Lens Specifications.

Minolta AF 70-210 F4

  • Build Quality - Very Good

  • Optical Configuration - 12 Elements in 9 Groups

  • Aperture - 7 Blades

  • Minimum Focus - 1.07m

  • Filter Size 55mm

  • Min F Stop - F/32

  • Weight - 693g

Pentax SMC M 135mm F3.5

  • Build Quality - Very Good

  • Optical Configuration - 5 Elements in 5 Groups

  • Aperture - 8 Blades

  • Minimum Focus - 1.50m

  • Filter Size - 49mm

  • Min F Stop - F/32

  • Weight - 270g

Pentax SMC M 50mm F1.7

  • Build Quality - Excellent

  • Optical Configuration - 6 Elements in 5 Groups

  • Aperture - 6 Blades

  • Minimum Focus - 0.45m

  • Filter Size - 49mm

  • Min F Stop - F/22

  • Weight - 185g

That's the only technical information I will cover in this article. This is not an article that will look at image quality in any great detail. I was really much more interested if the lenses for-filled the specific roll I had intended them for.

The first lens I purchased was the Pentax SMC M 135mm. I bought this specifically because I needed a telephoto option for my landscape images. The plus points where it was a prime lens so image quality should be better than a zoom especially as this was a 1980's lens and zooms from this period seem to be universally recognised as less sharp. One of the first images I took with it on my A7ii was from a woodland shoot. The image below of a single orchid amongst a carpet of bluebells came out rather well. It was shot at F3.5 to blur the background as much as possible and off a tripod at 1/15th of a second. I was very happy with this image and had no issues with image quality etc.

Using Legacy Lenses on Sony A7ii

The lens would next be used in the Peak District and a shoot from Kinder Scout. I wanted to shoot the sun going down behind Manchester but wanted the layered effect that a telephoto lens pulls together with the landscape from far and near seeming to be pulled closer. I was really happy with this shot which just shows some of the high rise buildings of Manchester in silhouette in the mid ground.


Using Legacy Lenses on Sony A7ii

I suppose I had been bittern by the bug a little by this point. I was happy with the performance of the 135mm Pentax and as I already had the adaptor I added the nifty 50mm to the collection so I could interchange the adaptor between them. I just saw the 50mm as a versatile little lens on the Sony A7ii which would allow me to get some nice bokeh with the 1.7 aperture. On reflection my 24-70 obviously covers this range but sometimes it is just a nice little lens to use. Thsi was one of the first images i shot with it, again doing some woodland work and shot from above with the tripod at F2.8 and 1/200 of a second.

Using Legacy Lenses on Sony A7ii

Again on another trip to the Peak District, this time wild camping which does start to make you rationalise the amount of kit you are carrying. In reality I probably should have left the 50mm at home on this occasion as the shot could have been taken with the 24-70, but as I had it I decided to use it and again could not complain at the result. This one taken at F/11 1/100sec off the tripod.

Using Legacy Lenses on Sony A7ii

The wild camping had really got me thinking about my kit choices. For me, especially in the summer a wild camp was the way forward as it enabled you to get a sunset and sunrise in one shoot. With the sun rising at around 4.30am it really was necessary to be close to your location. Wild camping obviously requires you to carry camera kit as well as tents, sleeping bags food and water. Carrying  three or four prime lenses was just not practical. It was then that I started to look at the possibility of a zoom lens to cover the 70-200 range.

I think its important to note here that this lens would be bought to do one job only and that was as a landscape lens. This meant it was going to be used for a very narrow set of requirements. So, it would be used almost exclusively off a tripod, although the Sony A7ii has in-camera stabilisation so hand holding was an option. It would generally be used at F8 and above so softness at F4 was not really a problem. And finally manual focus only was not an issue especially with Sonys Focus Peaking system which allows for precise manual focus. For those that don't know focus peaking is basically a red, yellow or white outline (your choice) that appears in the viewfinder and LCD when you manually focus a lens. This moves back and fourth as you move the focus letting you know exactly which part of the image is in sharp focus.

So, the Minolta 70-210 arrived and I soon had the adaptor attached and it mounted on the camera. The lens looked to be in really good order. Out I went and took some shots, and they where terrible! A couple of issues I noted. Number one was dust, when I got the images back to the PC I had to clear over fifty dust spots from the image it was everywhere. And secondly i had noticed that unusually the lens would focus to infinity and would be in focus. This may sound strange but every lens I had used previously would always go slightly past infinity and you would have to wind back a couple of millimetres to achieve sharp focus. Now the big factor here was the price of the lens, I would in no-way advise you to get your £2000 lens and start taking it to bits to remove the dust, but at £27 I had nothing to lose. As always I hit google and fund it was a fairly easy job top access the front of the lens, three grub screws later I had the front element open and had cleaned inside the front glass and as much of the inside as I could.

The following day I took it out again. Firstly, virtually no dust! In fact there may have been one spot, I could live with that! And the focus now slid the regulation couple of millimetres past infinity and BOOM the images where sharp! Here's a couple of shots recently taken with the lens, I think for £27 that's not a bad return.

It wasn't the sunset we had hoped for in Derbyshire on Blackden edge but at least it gave me chance to see the layering effect of the telephoto lens. Shot at 190mm.

It wasn't the sunset we had hoped for in Derbyshire on Blackden edge but at least it gave me chance to see the layering effect of the telephoto lens. Shot at 190mm.

And as we got back to the car I managed to grab this which was shot at 70mm as the moon came up and reflected off the river.

And as we got back to the car I managed to grab this which was shot at 70mm as the moon came up and reflected off the river.


Conclusion

I must admit I didn't have to think too hard about this conclusion. For me it became clear early on that there is a place for this old glass with your new digital camera. Certainly from a Sony point of view anyway. The Sony lends itself to this legacy glass with the focus peaking function which makes it so easy to manually focus on your subject.

Can this glass replace your new modern, image stabilised, price of a family car glass? Well yes in some circumstances, and I think this is where you really have to know what job you want the lens to do. As I mentioned earlier, when I bought the 70-210 I knew exactly what I wanted it for, it was for a very narrow set of circumstances. It would be required to shoot telephoto landscape shots at F8 and above. It would be almost exclusively on a tripod. And that was it , and the Minolta does this wonderfully. However, if I also wanted it to shoot sports photography of fast moving mountain bikers in dark woodland, would I have bought it? No, is the simple answer. If you are looking for a multi-purpose lens to cover many different aspects of photography I would suggest that a legacy lens would not be for you. In the instance I have described above I would almost certainly have gone with the Canon 70-200 F4 with an expensive adaptor to get autofocus, if this was not going to focus fast enough I would have probably bittern the bullet and paid for the native Sony 70-200.

As for the Minolta 70-210? Well it works well under a fairly narrow set of circumstances but it does have its issues. For me the biggest is the tiny manual focus ring at the very end of the lens which is very difficult to operate if you have a filter system attached, although those with smaller fingers may not find it so much of an issue. I found my copy a bit soft when wound out fully to 210mm but I suspect this may be the same for many zoom lenses.

I am sure there are many other instances where you can make use of some old glass in other aspects of photography and please let me know in the comments where you have found it to be useful. I also think that there can be something really satisfying about producing a stunning image on an old relatively inexpensive piece of glass that has been long discarded . Hopefully you found this article useful, and please keep your eyes out for my Youtube Vlog coming soon where I use the Minolta 70-210 in the field.

It's interesting to note that the prices of legacy glass seem to be on the rise so we may be onto something here!! 


A very shot trip to Whitby images and video!

After getting some time off work and with an afternoon to spare it can be difficult to find attractive landscape photography shots in the height of summer. If you ask most landscape photographers they will probably admit that this time of year is a real struggle. I tend to find that getting into some high mountains or onto the coast gives the best opportunities. Now that's a challenge in Nottinghamshire. So, after deciding that high mountains was the more difficult option it was a race to the coast, and on the east coast it doesn't get much more interesting than Whitby.

The setting for for Bram Stokers Dracula, or at least the British part of the story, the very place were the Demeter crashes onto the rocks and the count runs up towards the abbey in the form as a massive black dog. The place exudes atmosphere, even with the thousands of tourists milling about its streets it provides a thin veneer for the character swirling underneath. I had forgotten this until our visit and I can assure you that I will be back in the depths of winter with the veneer gone and Whitby's pores oozing as they once did in the 1880's.

Just click to watch!

Scott Tilley Photography - YouTube Channel

As I mentioned in the about page of my website, at the start of 2018 I opened my own Youtube Channel specifically dealing with all things Landscape Photography. I have found this to be a fun way to engage with other photographers and viewers. The Channel is only in its early stages but I try to produce a new video every week to ten days. Most of the videos run alongside shooting locations and are useful if other photographers are visiting that area of the country and are looking for potential locations to shoot. Mostly the videos are meant to be entertaining with some bits of useful information thrown in. As always I am always happy to receive comments either on Youtube or the website. If you want further information on a location than the video gives please contact me and if I can help I will.

This weeks video see's me coming down to normality after a fantastic week of photography in the far North West of Scotland. I shoot locally and try to get some interesting sots from around Newark Castle and the river Trent area.

The link to the video is below.